2026-06-14 06:32:10
TypeType功能:
这个项目有点意思,它没有选择目前最广泛使用的yt-dlp来实现相关功能,取而代之的是使用PipePipeExtractor。我在手动部署后体验了一下,给我的感觉是目前除了UI有点糙以外,这不是妥妥的神器,光无广告看油管就很爽了,还能下载视频到本地,还支持订阅、推送通知等等。只能说功能真的很全面了,就像个第三方的油管Web客户端。
该项目架构也非常清晰,作者声称纯古法编程,不使用AI:TypeType(前端),TypeType-Server(后端),TypeType-Downloader (下载服务),TypeType-Token (YouTube Proof-of-Origin令牌服务)全部都完整开源。
还贴心的提供了一键部署脚本:
curl -fsSL https://raw.githubusercontent.com/Priveetee/TypeType/main/scripts/install-stack.sh | bash但是这篇文章我想记录下纯手动部署的方法,因为一键部署的方案不适合我,且听我细嗦一下原因:
1.有很多无用的环境变量,以及无用的端口暴露。
2.使用了两个PostgreSQL数据库容器,其中有一个是专门用来创建第二个数据库用的,实际不存储数据,我觉得这个创建多数据库的方法不太优雅,完全可以合并到一个容器内。
3.我不使用官方默认提供的Garage S3服务,因为这个Garage S3日常维护很麻烦,我选择用VersityGW替代。或者你不想把下载的视频存储到服务器本地,你也可以通过手动部署的方式配置其它的S3存储。
4.这也是最关键的一点,我这台服务器的IP被油管拉黑了,这导致TypeType根本无法播放油管视频,后端日志一直显示“登录证明不是bot”,我也是很服。不过我折腾的mihomo透明代理正好可以派上用场了,就当是实战演练了,看看对于这种复杂的compose编排环境,mihomo透明代理到底是能有多爽。这是一个牵一发而动全身的改动,要用mihomo透明代理,很多配置都需要修改,一键脚本不再可靠。
5.在配置反向代理后,前端容器无法获取客户端的真实IP,为解决这个问题,我修改了前端容器的nginx.conf文件。
如果你决定使用我这篇文章的方法来部署TypeType,我建议先阅读这两篇文章:10165、10154先了解mihomo透明代理和VersityGW部署。
安装NGINX、CertBot、Docker:
apt update
apt install curl nginx python3-certbot-nginx
curl -fsSL https://get.docker.com -o get-docker.sh
sh get-docker.sh
新建compose文件:
mkdir /opt/typetype-with-mihomo && cd /opt/typetype-with-mihomo && nano docker-compose.yml写入如下内容:
services:
  mihomo:
    image: metacubex/mihomo:latest
    container_name: mihomo
    restart: always
    cap_add:
      - NET_ADMIN
    devices:
      - /dev/net/tun:/dev/net/tun
    volumes:
      - ./mihomo_config:/root/.config/mihomo
    ports:
      - "19090:9090"
      - "8082:80"
      - "8081:8081"

  typetype:
    image: ghcr.io/priveetee/typetype:latest
    volumes:
      - ./nginx.conf:/etc/nginx/conf.d/default.conf:ro
    depends_on:
      - typetype-server
    restart: unless-stopped
    network_mode: "service:mihomo"

  typetype-server:
    image: ghcr.io/priveetee/typetype-server:latest
    environment:
      DOWNLOADER_SERVICE_URL: http://127.0.0.1:18093
      ALLOWED_ORIGINS: "http://8.9.6.4:8082"
      DATABASE_URL: "jdbc:postgresql://127.0.0.1:5432/typetype"
      DATABASE_USER: "typetype"
      DATABASE_PASSWORD: "setyourpgpasswd"
      DRAGONFLY_URL: "redis://127.0.0.1:6379"
    depends_on:
      postgres:
        condition: service_started
      dragonfly:
        condition: service_started
      typetype-token:
        condition: service_started
      typetype-downloader:
        condition: service_started
    restart: unless-stopped
    network_mode: "service:mihomo"

  typetype-downloader:
    image: ghcr.io/priveetee/typetype-downloader:latest
    environment:
      HTTP_PORT: "18093"
      PUBLIC_BASE_URL: /api/downloader
      TYPETYPE_API_BASE: http://127.0.0.1:8080
      DB_URL: jdbc:postgresql://127.0.0.1:5432/typetype_downloader
      DB_USER: typetype
      DB_PASSWORD: setyourpgpasswd
      REDIS_HOST: 127.0.0.1
      REDIS_PORT: "6379"
      REDIS_QUEUE_KEY: downloader:queue
      MAX_CONCURRENT_WORKERS: "2"
      MAX_QUEUE_SIZE: "100"
      JOB_TTL_SECONDS: "600"
      DOWNLOAD_WORKERS: "8"
      DOWNLOAD_CHUNK_SIZE: "10485760"
      DOWNLOAD_RANGE_MODE: query
      MUXER: avformat
      STORAGE_BACKEND: s3
      S3_ENDPOINT: https://versitygw-s3.example.com
      S3_PUBLIC_ENDPOINT: https://versitygw-s3.example.com
      S3_REGION: us-east-1
      S3_BUCKET: typetype-downloads
      S3_ACCESS_KEY: hidden
      S3_SECRET_KEY: "hidden"
      S3_ARTIFACT_TTL_SECONDS: "7200"
    depends_on:
      postgres:
        condition: service_started
      dragonfly:
        condition: service_started
      typetype-token:
        condition: service_started
    restart: unless-stopped
    network_mode: "service:mihomo"

  typetype-token:
    image: ghcr.io/priveetee/typetype-token:latest
    init: true
    ipc: host
    environment:
      - NODE_ENV=production
    restart: unless-stopped
    network_mode: "service:mihomo"

  postgres:
    image: postgres:17
    environment:
      POSTGRES_DB: typetype
      POSTGRES_USER: typetype
      POSTGRES_PASSWORD: setyourpgpasswd
    volumes:
      - ./postgres_data:/var/lib/postgresql/data
      - ./init-multiple-databases.sql:/docker-entrypoint-initdb.d/init-multiple-databases.sql:ro
    restart: unless-stopped
    network_mode: "service:mihomo"

  dragonfly:
    image: docker.dragonflydb.io/dragonflydb/dragonfly:latest
    ulimits:
      memlock: -1
    restart: unless-stopped
    network_mode: "service:mihomo"
这个compose内的配置我觉得有必要详细说一下,不然很可能让人觉得一头雾水。首先要知道这些服务自身的端口,哪些端口需要暴露出来,哪些不需要暴露仅供容器内部互访:
typetype --> 8082:80 # 必须暴露
typetype-server --> 8080:8080 # 无须暴露
typetype-downloader --> 18093:18093 # 无须暴露
typetype-token --> 8081:8081 # 必须暴露
postgres --> 5432:5432 # 无须暴露
dragonfly --> 6379:6379 # 无须暴露由于全部服务都使用network_mode: "service:mihomo"来实现透明代理,所以必须作出这些改动:需要暴露端口的服务,必须把端口映射配置写在mihomo服务的ports列表里。不需要暴露的端口全部用于服务之间互访,服务之间不能再通过服务名来访问,必须改为127.0.0.1。
因此typetype-server的下载服务URL、PG数据库、Dragonfly数据库地址都需要改:
services:
  typetype-server:
    image: ghcr.io/priveetee/typetype-server:latest
    environment:
      DOWNLOADER_SERVICE_URL: http://127.0.0.1:18093
      DATABASE_URL: "jdbc:postgresql://127.0.0.1:5432/typetype"
      DRAGONFLY_URL: "redis://127.0.0.1:6379"
还有typetype-downloader的后端URL,PG数据库、Dragonfly数据库地址:
services:
  typetype-downloader:
    image: ghcr.io/priveetee/typetype-downloader:latest
    environment:
      HTTP_PORT: "18093"
      PUBLIC_BASE_URL: /api/downloader
      TYPETYPE_API_BASE: http://127.0.0.1:8080
      DB_URL: jdbc:postgresql://127.0.0.1:5432/typetype_downloader
      REDIS_HOST: 127.0.0.1
      REDIS_PORT: "6379"
我的示例配置已经这样配置了,这里只是说明为什么需要这么配置,以及为什么这么配置多个服务之间能够正常工作,就算你不改直接照搬也能用。而接下来要说的内容是必须要修改的。首先得给typetype-downloader配置s3存储:
services:
  typetype-downloader:
    image: ghcr.io/priveetee/typetype-downloader:latest
    environment:
      STORAGE_BACKEND: s3
      S3_ENDPOINT: https://versitygw-s3.example.com
      S3_PUBLIC_ENDPOINT: https://versitygw-s3.example.com
      S3_REGION: us-east-1
      S3_BUCKET: typetype-downloads
      S3_ACCESS_KEY: hidden
      S3_SECRET_KEY: "hidden"
      S3_ARTIFACT_TTL_SECONDS: "7200"
配置typetype-server的CORS,否则后端将拒绝(403)不在列表里的前端(域名)请求后端。如果不使用反向代理就配置成服务器公网IP:
services:
  typetype-server:
    image: ghcr.io/priveetee/typetype-server:latest
    environment:
      ALLOWED_ORIGINS: "http://8.9.6.4:8082"
配置多个:
services:
  typetype-server:
    image: ghcr.io/priveetee/typetype-server:latest
    environment:
      ALLOWED_ORIGINS: "http://8.9.6.4:8082,https://typetype.example.com"
compose的配置就全部完成了,现在新建一个nginx.conf,这是TypeType前端服务(容器)需要用到的NGINX配置文件:
nano nginx.conf写入如下内容:
server {
    listen 80;
    root /usr/share/nginx/html;
    index index.html;
    client_max_body_size 2g;
    gzip on;
    gzip_types text/plain text/css application/javascript application/json image/svg+xml;

    set_real_ip_from  10.0.0.0/8;
    set_real_ip_from  172.16.0.0/12;
    real_ip_header    X-Forwarded-For;
    real_ip_recursive on;

    location ^~ /api/ {
        client_max_body_size 2g;
        proxy_pass http://127.0.0.1:8080/;
        proxy_http_version 1.1;
        proxy_set_header Host $host;
        proxy_set_header X-Real-IP $remote_addr;
        proxy_set_header X-Forwarded-For $proxy_add_x_forwarded_for;
        proxy_buffering off;
    }

    location / {
        try_files $uri $uri/ /index.html;
    }

    location ~* \.(js|css|png|jpg|jpeg|gif|ico|svg|woff|woff2)$ {
        expires 1y;
        add_header Cache-Control "public, immutable";
    }
}这里有几个细节,后端地址必须使用127.0.0.1:8080,而不是typetype-server:8080,原因之前说过在使用network_mode: "service:mihomo"后容器之间不能再通过服务名来访问:
location ^~ /api/ {
    client_max_body_size 2g;
    proxy_pass http://127.0.0.1:8080/;
}
在使用主机的NGINX反向代理后,前端容器获取不到客户端的真实IP,所以我加了如下内容到配置文件:
set_real_ip_from  10.0.0.0/8;
set_real_ip_from  172.16.0.0/12;
real_ip_header    X-Forwarded-For;
real_ip_recursive on;
该项目的设计架构是后端服务需要用到一个数据库,下载服务也需要一个数据库,所以这里新建一个.sql文件,创建第二个数据库用于下载服务:
nano init-multiple-databases.sql写入如下内容:
CREATE DATABASE typetype_downloader;还需要新建一个目录用于存放mihomo的配置文件和其它资源(如:控制面板文件、rule-set文件)
mkdir mihomo_config新建mihomo的配置文件:
nano mihomo_config/config.yaml这是我的示例配置:
mixed-port: 7890
allow-lan: true
tcp-concurrent: true
find-process-mode: strict
mode: rule
log-level: info
ipv6: false
keep-alive-interval: 30
unified-delay: true

profile:
  store-selected: true
  store-fake-ip: false

external-controller: 0.0.0.0:9090
external-controller-cors:
  allow-origins:
    - '*'
  allow-private-network: true
secret: "89641937"
external-ui: "./ui"
external-ui-name: zashboard
external-ui-url: "https://github.com/Zephyruso/zashboard/archive/refs/heads/gh-pages.zip"

tun:
  enable: true
  stack: mixed
  auto-route: true
  auto-redirect: false
  auto-detect-interface: true
  dns-hijack:
    - any:53
  strict-route: true
  mtu: 1500

dns:
  enable: true
  cache-algorithm: arc
  prefer-h3: false
  use-hosts: true
  use-system-hosts: true
  listen: 127.0.0.1:6868
  ipv6: false
  enhanced-mode: redir-host
  default-nameserver:
    - 8.8.8.8
    - 1.1.1.1
  nameserver:
    - https://cloudflare-dns.com/dns-query
    - https://dns.google/dns-query
  proxy-server-nameserver:
    - https://cloudflare-dns.com/dns-query
    - https://dns.google/dns-query
  direct-nameserver:
    - https://dns.google/dns-query
    - https://cloudflare-dns.com/dns-query
  respect-rules: true

sniffer:
  enable: true
  force-dns-mapping: true
  parse-pure-ip: true
  sniff:
    HTTP:
      ports:
        - 80
        - 8080-8880
      override-destination: true
    TLS:
      ports:
        - 443
        - 8443

proxies:
  - name: proxy1
    type: anytls
    server: 8.9.6.4
    port: 8443
    password: "hidden"
    client-fingerprint: chrome
    udp: true
    idle-session-check-interval: 30
    idle-session-timeout: 30
    min-idle-session: 5
    sni: "anytls.example.com"
    alpn:
      - h2
    skip-cert-verify: false

proxy-groups:
  - name: PROXY
    icon: https://cdn.jsdelivr.net/gh/Koolson/Qure@master/IconSet/Color/Hijacking.png
    type: select
    proxies:
      - proxy1

rule-providers:
  geosite-youtube:
    type: http
    behavior: domain
    format: mrs
    url: https://github.com/MetaCubeX/meta-rules-dat/raw/meta/geo/geosite/youtube.mrs
    path: ./rule-sets/youtube.mrs
    interval: 86400
    proxy: proxy1

rules:
  - DOMAIN-SUFFIX,ipinfo.io,PROXY
  - RULE-SET,geosite-youtube,PROXY
  - MATCH,DIRECT
该配置并非最佳实践,里面包含一些无用或者多余的配置项,但并不会影响实际使用。
现在启动所有服务:
docker compose up -d配置NGINX反向代理:
nano /etc/nginx/sites-available/typetype写入如下内容:
server {
    listen 80;
    server_name typetype.example.com;

    location / {
        proxy_pass http://127.0.0.1:8082;
        proxy_set_header Host $host;
        proxy_set_header X-Real-IP $remote_addr;
        proxy_set_header X-Forwarded-For $proxy_add_x_forwarded_for;
        proxy_set_header X-Forwarded-Proto $scheme;
    }
}
启用站点:
ln -s /etc/nginx/sites-available/typetype /etc/nginx/sites-enabled/typetype签发证书:
certbot --nginx测试下效果,油管视频可正常播放:

b站视频可正常播放:

这个东西牛逼之处就在于你可以按需来跳过自己不想看到的内容,比如广告,自推销:
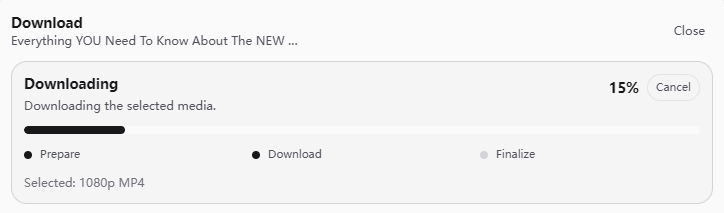
视频下载我也测试了一下,油管的视频可以下载,b站的不行,应该是有BUG:
s3桶里有下载的视频文件:

他这个视频下载实现的逻辑是先把视频下载保存到s3,再从s3获取一个预签名的下载链接。我觉得这块可以优化一下,比如视频下载保存到s3后,再次播放就不走源站了,直接从s3播放,这样的话可以防止原视频失效,也能让保存在s3内的视频发挥作用。总的来说我觉得这个程序在细节上还有很多地方值得完善。
再就是你可以看到这样一个项目,前端TypeScript,后端Kotlin,下载服务Golang,无论容器内的App用什么语言,mihomo都能完美透明代理,简直不要太爽。我还学到一个小技巧,虽然最后没派上用场还是上代理解决的,但是我觉得这个方案在某些时候应该是可行的,既然IPv4被油管拉黑了,那不妨试试IPv6。既然后端是Kotlin,那可以设置一个环境变量让其优先使用IPv6访问:
services:
  typetype-server:
    image: ghcr.io/priveetee/typetype-server:latest
    environment:
      _JAVA_OPTIONS: "-Djava.net.preferIPv6Addresses=true"
然后你就会掉到另一个坑里面,后端连不上Dragonfly数据库了!因为它没监听IPv6地址,你还得改一下配置:
services:
  dragonfly:
    image: docker.dragonflydb.io/dragonflydb/dragonfly:latest
    command: ["--bind", "0.0.0.0", "--bind", "::"]
除此之外,你还要在这个compose里面启用IPv6:
services:
  typetype:
    image: ghcr.io/priveetee/typetype:latest
    networks:
      - typetype-net

  typetype-server:
    image: ghcr.io/priveetee/typetype-server:latest
    networks:
      - typetype-net

  typetype-downloader:
    image: ghcr.io/priveetee/typetype-downloader:latest
    networks:
      - typetype-net

  typetype-token:
    image: ghcr.io/priveetee/typetype-token:latest
    networks:
      - typetype-net

  postgres:
    image: postgres:17
    networks:
      - typetype-net

  dragonfly:
    image: docker.dragonflydb.io/dragonflydb/dragonfly:latest
    networks:
      - typetype-net

networks:
  typetype-net:
    enable_ipv6: true
最后的最后,你可能还需要为Docker启用IPv6 NAT,方法见这篇文章。我试了我的IPv6也被油管拉黑了,所以这是一个失败的尝试。我还是建议能用mihomo就直接用mihomo。
2026-06-13 06:28:16
我经常遇到在服务器上部署的容器需要用到代理的情况,给容器配置代理,最常见的是使用HTTP_PROXY环境变量,但是这个变量并不是所有App都认的,有些跑在容器里面的App根本不鸟这个变量,这时候就有点蛋疼了。
今天分享一个利用mihomo让容器全部无感透明代理的思路,这套配置简洁、优雅、易于使用,且适用所有容器内的App,不管容器内跑的是Java还是Node.js亦或者其它的什么东西,都能够直接连上mihomo的节点实现代理访问互联网。
其实sing-box也可以做到同样的效果,只要代理软件支持TUN,且具备自动接管路由表的能力,都可以用这种配置方式,只是我不想搓sing-box的json配置文件,太麻烦了,想比较之下mihomo的yaml配置文件搓起来简单点。。
新建compose文件:
mkdir /opt/mihomo && cd /opt/mihomo && nano docker-compose.yml写入如下内容:
services:
  mihomo:
    image: metacubex/mihomo:latest
    container_name: mihomo
    restart: always
    cap_add:
      - NET_ADMIN
    devices:
      - /dev/net/tun:/dev/net/tun
    volumes:
      - ./mihomo_config:/root/.config/mihomo
    ports:
      - "19090:9090" # 外部控制面板(可选)
      - "8080:8080" # 如果应用容器有自己的端口要暴露,端口必须映射在这里

  # 你的实际应用容器,这里的容器仅为演示代理效果
  my_app:
    image: nicolaka/netshoot:latest
    container_name: my_app
    network_mode: "service:mihomo" # 共享mihomo代理容器的网络栈
    depends_on:
      - mihomo
command: ["/bin/sh", "-c", "while true; do sleep 3600; done"]这套配置的核心就这一行:network_mode: "service:mihomo",让我简单解释一下其作用。在Docker中,默认情况下每个容器都有自己独立的“网络空间”(Network Namespace),里面有独立的网卡、路由表和iptables规则。
但是当你配置network_mode: "service:mihomo"时,等于把应用容器(App)强行塞进了代理容器(Proxy)的“网络空间”里。此时:它们共享同一张虚拟网卡,共享同一套路由表。
当代理软件在容器内开启TUN模式时,它会在这个“网络空间”创建一个虚拟网卡,并把默认路由指向虚拟网卡。由于应用容器也在这个“网络空间”里,所以理所当然它的流量也会被路由表直接导向虚拟网卡。
在这个模式下,你可能会遇到一些“坑点”,这里我也简单说一下。
1.端口映射(Ports)必须声明在“代理容器”上:一旦配置了network_mode: "service:mihomo",你的应用容器(本文示例:my_app)就已经失去了独立网络主权,它无法再声明自己的端口。假设你的应用是一个Web服务(比如NGINX监听8080端口),你必须把-"8080:8080"写在mihomo容器的ports列表里。
2.容器间通信名字变了:一旦容器加入了代理的“网络空间”,它就失去了在Docker默认网桥上的“独立姓名”,容器间通过服务名(如nginx、postgres)互相寻址的机制就会失效。在默认情况下,其他Docker容器可以通过http://my_app:8080访问该应用,但现在my_app在Docker默认网络中相当于“隐身”了。你应该将所有的内部互访全部改写为127.0.0.1(本地回环)例如对于本文的示例而言,应修改为:http://127.0.0.1:8080
其实我之前有一篇文章介绍过GlueTun这个项目,其采用的是与本文一样的方式,只是这个GlueTun不太适合在中国内地使用,它支持的几乎全部都是收费的VPN,对于我们平时常用的代理协议是全部都不支持。
那么现在让我们继续对mihomo进行配置,新建一个目录用于存放mihomo的配置文件和其它资源(如:控制面板文件、rule-set文件)
mkdir mihomo_config新建mihomo的配置文件:
nano mihomo_config/config.yaml这是我的示例配置:
mixed-port: 7890
allow-lan: true
tcp-concurrent: true
find-process-mode: strict
mode: rule
log-level: info
ipv6: false
keep-alive-interval: 30
unified-delay: true

profile:
  store-selected: true
  store-fake-ip: false

external-controller: 0.0.0.0:9090
external-controller-cors:
  allow-origins:
    - '*'
  allow-private-network: true
secret: "89641937"
external-ui: "./ui"
external-ui-name: zashboard
external-ui-url: "https://github.com/Zephyruso/zashboard/archive/refs/heads/gh-pages.zip"

tun:
  enable: true
  stack: mixed
  auto-route: true
  auto-redirect: false
  auto-detect-interface: true
  dns-hijack:
    - any:53
  strict-route: true
  mtu: 1500

dns:
  enable: true
  cache-algorithm: arc
  prefer-h3: false
  use-hosts: true
  use-system-hosts: true
  listen: 127.0.0.1:6868
  ipv6: false
  enhanced-mode: redir-host
  default-nameserver:
    - 8.8.8.8
    - 1.1.1.1
  nameserver:
    - https://cloudflare-dns.com/dns-query
    - https://dns.google/dns-query
  proxy-server-nameserver:
    - https://cloudflare-dns.com/dns-query
    - https://dns.google/dns-query
  direct-nameserver:
    - https://dns.google/dns-query
    - https://cloudflare-dns.com/dns-query
  respect-rules: true

sniffer:
  enable: true
  force-dns-mapping: true
  parse-pure-ip: true
  sniff:
    HTTP:
      ports:
        - 80
        - 8080-8880
      override-destination: true
    TLS:
      ports:
        - 443
        - 8443

proxies:
  - name: proxy1
    type: anytls
    server: 8.9.6.4
    port: 8443
    password: "hidden"
    client-fingerprint: chrome
    udp: true
    idle-session-check-interval: 30
    idle-session-timeout: 30
    min-idle-session: 5
    sni: "anytls.example.com"
    alpn:
      - h2
    skip-cert-verify: false

proxy-groups:
  - name: PROXY
    icon: https://cdn.jsdelivr.net/gh/Koolson/Qure@master/IconSet/Color/Hijacking.png
    type: select
    proxies:
      - proxy1

rule-providers:
  geosite-youtube:
    type: http
    behavior: domain
    format: mrs
    url: https://github.com/MetaCubeX/meta-rules-dat/raw/meta/geo/geosite/youtube.mrs
    path: ./rule-sets/youtube.mrs
    interval: 86400
    proxy: proxy1

rules:
  - DOMAIN-SUFFIX,ipinfo.io,PROXY
  - RULE-SET,geosite-youtube,PROXY
- MATCH,DIRECT该配置并非最佳实践,里面包含一些无用或者多余的配置项,但并不会影响实际使用。此配置是根据我的这篇文章随便改了下而来的,又不是不能用。
在rules这块,兜底走的是MATCH,DIRECT(直连)而非MATCH,PROXY(代理)是因为我将其部署在境外的服务器上,境外本来就没有GFW这种垃圾东西(伊朗和俄罗斯这种国家除外),自然没有必要将所有流量都走代理,能直连就尽量直连。我更多的是为了解决服务器自身IP太脏,被Youtube等流媒体平台拉黑的问题,当然具体怎么使用取决于你自己的网络环境。
启动:
docker compose up -d测试一下应用容器内是否成功走了代理:

补充一点内容,本文提供的mihomo配置文件内启用了zashboard控制面板:
http://serverip:19090/ui/zashboard/
密码:89641937
如果要使用这个控制面板,请根据如图所示进行配置(修改主机的IP地址为你的服务器公网IP,端口19090):

2026-06-12 14:52:14
这个VersityGW官方称为高性能S3转换服务,和Garage是完全不同的实现。
VersityGW是无状态的,且数据是原样保存的,假设你上传了一个hello.txt(内容是 “hello world”)你可以看数据目录下的结构:
./data/
└── my-bucket/
    └── hello.txt
而Garage的数据目录类似:
./data/
└── a1/
    └── f8e2c...
VersityGW主打一个简单、高效、易于部署,我其实挺喜欢VersityGW这种设计方案的,反正作为普通用户在使用层面是完全无感的。
安装Docker:
apt -y update
apt -y install curl
curl -fsSL https://get.docker.com -o get-docker.sh
sh get-docker.sh
安装NGINX、CertBot:
apt update
apt install nginx python3-certbot-nginx
创建目录新建compose文件:
mkdir /opt/versitygw && cd /opt/versitygw && nano docker-compose.yml写入如下内容:
services:
  versitygw:
    image: ghcr.io/versity/versitygw:latest
    ports:
      - "127.0.0.1:7070:7070"
      - "127.0.0.1:7071:7071"
      - "127.0.0.1:8080:8080"
    environment:
      ROOT_ACCESS_KEY: imlala
      ROOT_SECRET_KEY: setyourpassword
      VGW_PORT: ":7070"
      VGW_IAM_DIR: /data/iam
      VGW_VERSIONING_DIR: /data/versioning
      VGW_BACKEND: posix
      VGW_BACKEND_ARGS: /data/s3
      VGW_ADMIN_PORT: ":7071"
      VGW_WEBUI_PORT: ":8080"
      VGW_WEBUI_GATEWAYS: "https://versitygw-s3.example.com"
      VGW_WEBUI_ADMIN_GATEWAYS: "https://versitygw-admin.example.com"
    volumes:
      - ./data/s3:/data/s3
      - ./data/versioning:/data/versioning
      - ./data/iam:/data/iam
    restart: unless-stopped
7070是s3 api端口,7071是管理api端口,8080是webui端口。对于生产环境而言,建议使用反向代理。我这里使用NGINX反向代理:
https://versitygw-s3.example.com --> 7070端口
https://versitygw-admin.example.com --> 7071端口
https://versitygw-console.example.com --> 8080端口[不推荐]如果不使用反向代理,可以将VGW_WEBUI_GATEWAYS、VGW_WEBUI_ADMIN_GATEWAYS配置为服务器的公网IP:
services:
  versitygw:
    image: ghcr.io/versity/versitygw:latest
    ports:
      - "7070:7070"
      - "7071:7071"
      - "8080:8080"
    environment:
      VGW_WEBUI_GATEWAYS: "http://8.9.6.4:7070"
      VGW_WEBUI_ADMIN_GATEWAYS: "http://8.9.6.4:7071"
[不推荐]如果你在没有公网IP的环境下部署,如本地测试环境,可以配置为localhost:
services:
  versitygw:
    image: ghcr.io/versity/versitygw:latest
    ports:
      - "7070:7070"
      - "7071:7071"
      - "8080:8080"
    environment:
      VGW_WEBUI_GATEWAYS: "http://localhost:7070"
      VGW_WEBUI_ADMIN_GATEWAYS: "http://localhost:7071"
创建VersityGW需要用到的目录:
mkdir -p ./data/s3 ./data/versioning ./data/iam启动:
docker compose up -d新建NGINX站点配置文件:
nano /etc/nginx/sites-available/versitygw写入如下内容:
upstream versity_s3_backend {
    server 127.0.0.1:7070;
    keepalive 32; # 保持 32 个空闲长连接,提升高频请求性能
}

upstream versity_admin_backend {
    server 127.0.0.1:7071;
    keepalive 8;
}

upstream versity_webui_backend {
    server 127.0.0.1:8080;
    keepalive 8;
}

server {
    listen 80;
    listen [::]:80;
    server_name versitygw-s3.example.com; # 替换为你的 S3 访问域名
    client_max_body_size 0;

    # 关键设置:禁用缓冲,确保大文件分片上传和流式传输时不会塞满 Nginx 缓存
    proxy_buffering off;
    proxy_request_buffering off;

    location / {
        proxy_pass http://versity_s3_backend;
        proxy_set_header Host $http_host;
        proxy_set_header X-Real-IP $remote_addr;
        proxy_set_header X-Forwarded-For $proxy_add_x_forwarded_for;
        proxy_set_header X-Forwarded-Proto $scheme;
        # 优化长连接
        proxy_http_version 1.1;
        proxy_set_header Connection "";
    }
}

server {
    listen 80;
    listen [::]:80;
    server_name versitygw-admin.example.com; # 替换为你的管理 API 域名

    location / {
        proxy_pass http://versity_admin_backend;
        proxy_set_header Host $host;
        proxy_set_header X-Real-IP $remote_addr;
        proxy_set_header X-Forwarded-For $proxy_add_x_forwarded_for;
        proxy_set_header X-Forwarded-Proto $scheme;
    }
}

server {
    listen 80;
    listen [::]:80;
    server_name versitygw-console.example.com; # 替换为你的 Web UI 域名

    location / {
        proxy_pass http://versity_webui_backend;
        proxy_set_header Host $host;
        proxy_set_header X-Real-IP $remote_addr;
        proxy_set_header X-Forwarded-For $proxy_add_x_forwarded_for;
        proxy_set_header X-Forwarded-Proto $scheme;
    }
}
启用站点:
ln -s /etc/nginx/sites-available/versitygw /etc/nginx/sites-enabled/versitygw签发证书:
certbot --nginx访问versitygw-console.example.com,使用ROOT_ACCESS_KEY、ROOT_SECRET_KEY登录Web UI:

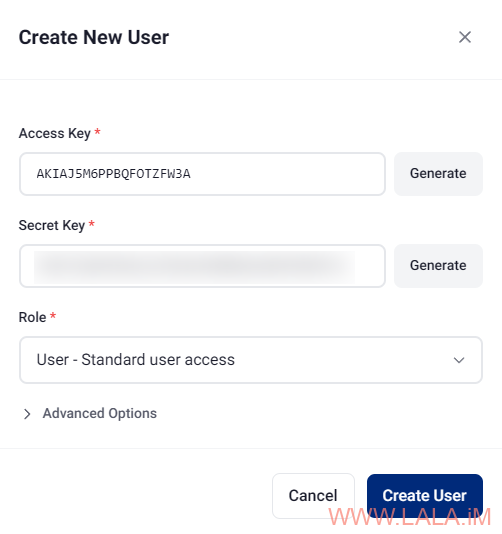
创建一个普通用户:
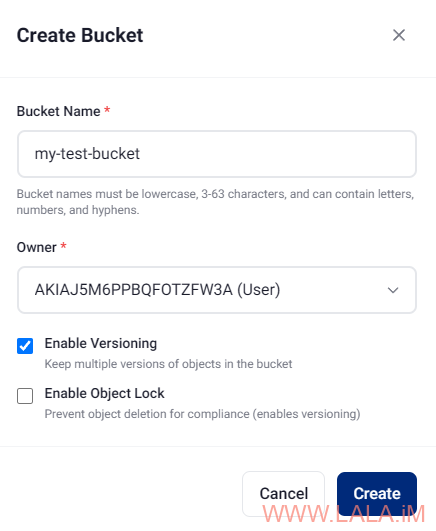
创建bucket,设置所有者为刚才创建的用户:
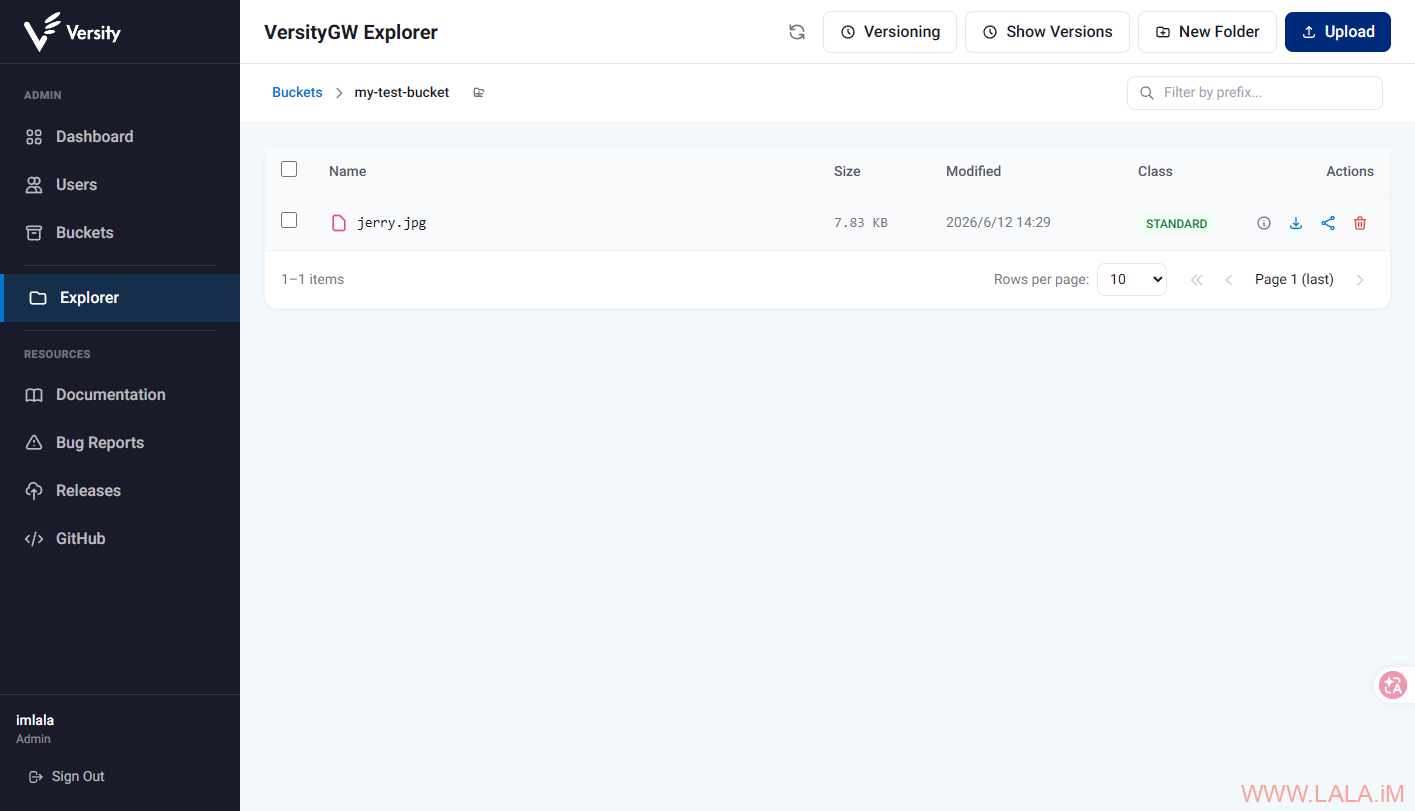
上传文件测试:
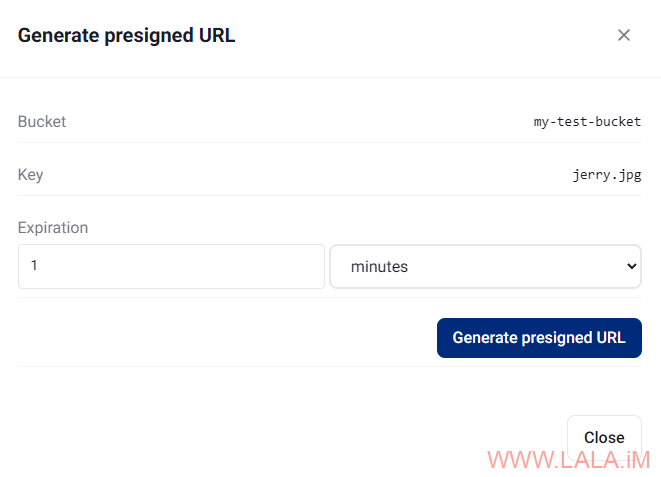
可以为文件生成presigned URL供临时访问:
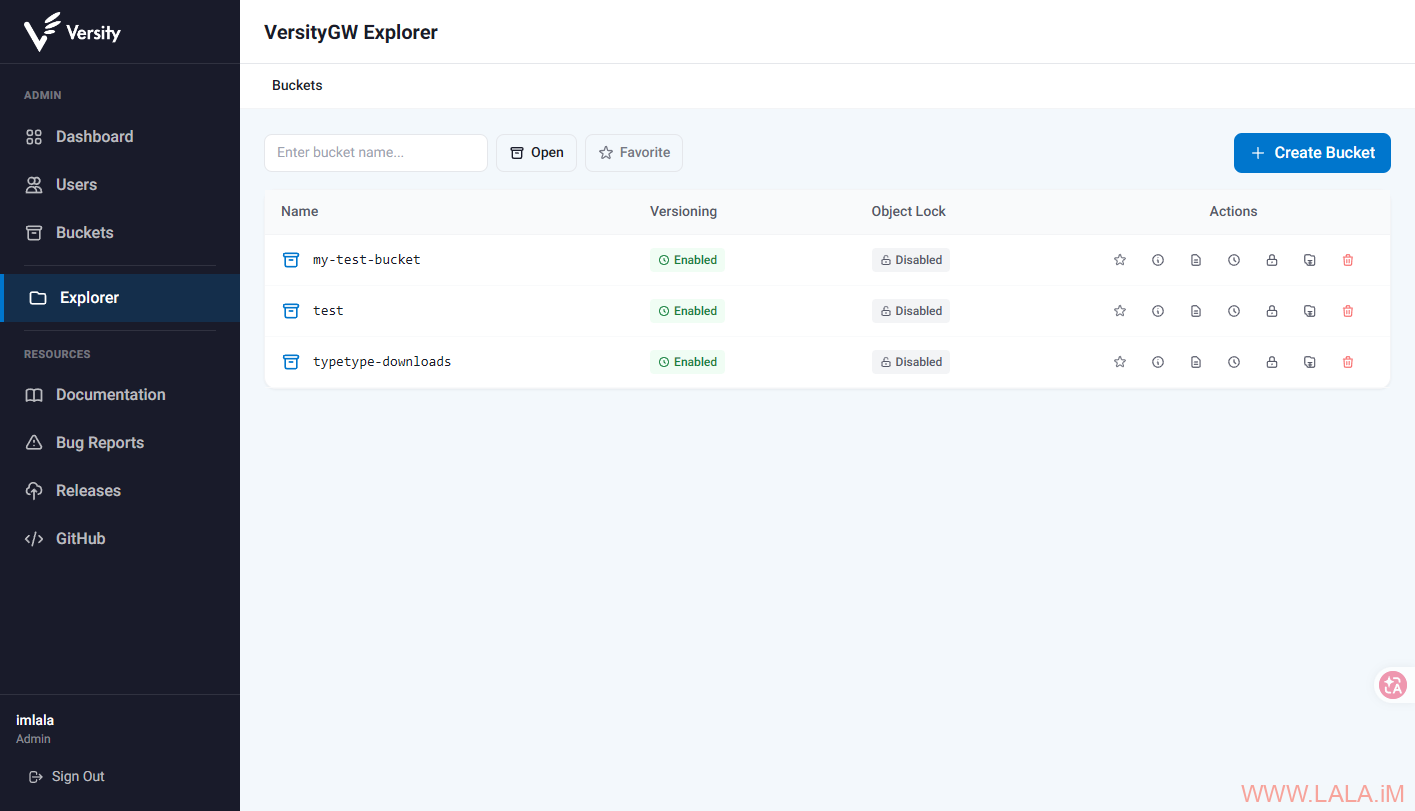
管理bucket:
这绝对又是一个MinIO的绝佳替代品,MinIO已经死了没啥好对比的了,与Garage对比的话,我觉得VersityGW无论是部署还是平时使用都比Garage简单太多了,上手自然也比Garage快,毕竟自带Web UI,而且比Garage多了版本控制功能。
2026-06-07 22:17:51
Sync-in介绍(摘自项目页面)
Sync-in旨在让个人和组织完全掌控自己的文件和文档,让您可以托管自己的工作区,以便与您的团队、社区或个人用户一起组织、访问和协作处理内容。它运行在您自己的基础设施上,让您掌控自己的数据,同时实现安全的文件共享、协作工作空间和细粒度的访问控制。
我初次看到这个项目的时候,说实话第一感觉就是这个前端未必有点太“复古”了吧,不知道该怎么表达好,就是感觉不够现代化。实际部署后使用下来感觉操作也不太顺手,很多操作很别扭,熟悉了好长时间才有所好转。。简单总结就是UI/UX这块有点拉跨。。
但我为什么还是要推荐一下这个项目,因为这个项目的完成度真的很高,有点惊艳到我了,别看它只有1.4k star,该有的功能全部都有,见与开源软件比较、与闭源软件比较。
它甚至还有全平台的同步客户端,如果你不在意UI/UX这块的问题,(其实看久了也还好= =)完全可以用它平替掉Nextcloud之类的产品。我这段时间使用下来,这个程序给我的总体感觉就是:看似古董,但稳的一匹。
这篇文章记录下Sync-in的部署步骤(含Collabora Online、OnlyOffice集成)
安装Docker:
apt -y update
apt -y install curl git
curl -fsSL https://get.docker.com -o get-docker.sh
sh get-docker.sh
安装NGINX、CertBot:
apt update
apt install nginx python3-certbot-nginx
下载解压部署需要用到的各种配置文件:
cd /opt
curl -L -o sync-in-docker.tar.gz \
https://github.com/Sync-in/server/releases/latest/download/sync-in-docker.tar.gz && \
tar zxvf sync-in-docker.tar.gz
进入目录:
cd sync-in-docker编辑environment.yaml:
nano environment.yaml我的配置如下:
server:
  trustProxy: 1
mysql:
  url: mysql://root:mysqlpassword@mariadb:3306/sync_in # 修改mysqlpassword为强密码
auth:
  encryptionKey: changeEncryptionKeyWithStrongKey # openssl rand -hex 16 生成
  token:
    access:
      secret: changeAccessWithStrongSecret # openssl rand -hex 16 生成
    refresh:
      secret: changeRefreshWithStrongSecret # openssl rand -hex 16 生成
applications:
  files:
    dataPath: /app/data
    collabora:
      enabled: true # 不需要文档协作可以关闭
    onlyoffice:
      enabled: true # 不需要文档协作可以关闭
      secret: changeOnlyofficeWithStrongSecret # openssl rand -hex 16 生成
编辑docker-compose.yaml:
nano docker-compose.yaml我的配置如下:
include:
#  - ./config/nginx/docker-compose.nginx.yaml
  - ./config/onlyoffice/docker-compose.onlyoffice.yaml
  - ./config/collabora/docker-compose.collabora.yaml
#  - ./config/sync-in-desktop-releases/docker-compose.sync-in-desktop-releases.yaml

name: sync-in
services:
  sync_in:
    image: syncin/server:2
    container_name: sync-in
    restart: always
    environment:
      - INIT_ADMIN=true
      - INIT_ADMIN_PASSWORD=adminpass # 设置管理员密码
      - INIT_ADMIN_LOGIN=imlala # 设置管理员账号
      - PUID=${PUID:-8888}
      - PGID=${PGID:-8888}
    ports:
      - "127.0.0.1:8080:8080"
    volumes:
      - ./environment.yaml:/app/environment/environment.yaml
      - ./data:/app/data
      - desktop_releases:/app/static/releases:ro
    depends_on:
      - mariadb
    logging:
      driver: json-file
      options:
        max-size: "25m"
        max-file: "5"
    networks:
      - sync_in_network

  mariadb:
    image: mariadb:11
    container_name: mariadb
    restart: always
    command: --innodb_ft_cache_size=16000000 --max-allowed-packet=1G
    environment:
      MYSQL_ROOT_PASSWORD: mysqlpassword # 设置数据库root密码,确保与environment.yaml内的值一致
      MYSQL_DATABASE: sync_in
    volumes:
      - ./mariadb_data:/var/lib/mysql
    networks:
      - sync_in_network

networks:
  sync_in_network:
    driver: bridge

volumes:
  desktop_releases:
这个配置和官方的出入有些大,具体说一下为什么这么配置。
1.我不使用Docker运行NGINX,因为这会占用我主机的80/443端口,所以注释掉docker-compose.nginx.yaml。这个修改会同时影响到collabora和onlyoffice容器的部署,所以后面还需要对collabora以及onlyoffice容器的配置进行修改,主要就是加个端口映射把端口暴露出来。后续我将使用主机的NGINX统一反代sync-in、collabora、onlyoffice。
2.sync-in和mariadb容器用来存重要数据的卷都改为bind mount,这是官方文档推荐用于生产环境的做法。这个desktop_releases的命名卷我就不改了,不重要哈,可有可无。
3.取消docker-compose.onlyoffice.yaml、docker-compose.collabora.yaml注释,如果你不需要文档编辑可以保持默认的注释状态。
编辑docker-compose.collabora.yaml:
nano config/collabora/docker-compose.collabora.yaml修改–o:ssl.termination=true,添加端口映射把9980端口暴露出来:
services:
  collabora:
    image: collabora/code
    container_name: collabora
    restart: always
    environment:
      extra_params: >-
        --o:ssl.enable=false
        --o:ssl.termination=true
        --o:logging.disable_server_audit=true
        --o:admin_console.enable=false
    cap_drop:
      - ALL
    cap_add:
      - SYS_CHROOT
      - SYS_ADMIN
      - FOWNER
      - CHOWN
    logging:
      driver: json-file
      options:
        max-size: "25m"
        max-file: "5"
    networks:
      - sync_in_network
    ports:
      - "127.0.0.1:9980:9980"
编辑docker-compose.onlyoffice.yaml:
nano config/onlyoffice/docker-compose.onlyoffice.yaml修改JWT_SECRET为你在environment.yaml内配置的值,添加端口映射把80端口暴露出来:
services:
  onlyoffice:
    image: onlyoffice/documentserver:9.3
    container_name: onlyoffice
    restart: always
    environment:
      - JWT_SECRET=changeOnlyofficeWithStrongSecret
      - JWT_IN_BODY=true
      - USE_UNAUTHORIZED_STORAGE=true
    logging:
      driver: json-file
      options:
        max-size: "25m"
        max-file: "5"
    networks:
      - sync_in_network
    ports:
      - "127.0.0.1:9981:80"
启动:
docker compose up -d新建NGINX站点配置文件,统一反代sync-in、collabora、onlyoffice:
nano /etc/nginx/sites-available/sync-in写入如下内容:
map $http_upgrade $connection_upgrade {
    default upgrade;
    ''      close;
}

upstream sync_in_server {
    server 127.0.0.1:8080;
    keepalive 32;
}

upstream collabora {
    server 127.0.0.1:9980;
    keepalive 32;
}

upstream onlyoffice {
    server 127.0.0.1:9981;
    keepalive 32;
}

server {
    listen 80;
    listen [::]:80;
    server_name sync-in.example.com;

    # General settings
    charset UTF-8;
    server_tokens off;
    access_log off;
    include mime.types;

    # Optimized file sending
    sendfile on;
    tcp_nodelay on;
    tcp_nopush on;

    # Buffering for requests proxied to Node
    proxy_http_version 1.1;
    chunked_transfer_encoding on;
    proxy_set_header Host $host;
    proxy_set_header X-Real-IP  $remote_addr;
    proxy_set_header X-Forwarded-For $proxy_add_x_forwarded_for;
    proxy_set_header X-Forwarded-Host $host;
    proxy_set_header X-Forwarded-Proto $scheme;
    proxy_set_header Upgrade $http_upgrade;
    proxy_set_header Connection $connection_upgrade;
    proxy_cache_bypass $http_upgrade;
    proxy_redirect off;

    # Proxy buffering settings
    proxy_buffering off; # nginx -> node
    proxy_buffers 8 512k;
    proxy_buffer_size 512k; # node highWaterMark

    # Generous timeouts for long transfers or ws
    proxy_read_timeout 3600s;
    proxy_send_timeout 3600s;
    keepalive_timeout  180  90s;

    # Clients settings
    proxy_request_buffering off; # client -> nginx
    large_client_header_buffers 4 16k;
    client_max_body_size 0;
    client_body_buffer_size 25M;

    location / {
        proxy_pass http://sync_in_server;
    }

    location ~* .(ico|jpg|png|gif|jpeg|swf|woff|svg)$ {
        # nginx always use the most accurate rule in its internal routing policies
        proxy_pass http://sync_in_server;
        gzip_static on;
        gzip_comp_level 5;
        expires 1d;
        add_header Cache-Control public;
    }

    # Static Files
    location ^~ /browser/ {
        proxy_pass http://collabora;
        proxy_set_header Host $http_host;
    }

    # WOPI Discovery URL and Capabilities
    location ^~ /hosting/ {
        proxy_pass http://collabora;
        proxy_set_header Host $http_host;
    }

    # Main WebSocket + Docs Management
    location ^~ /cool/ {
        proxy_pass http://collabora;
        proxy_set_header Host $http_host;
        proxy_set_header Upgrade $http_upgrade;
        proxy_set_header Connection $connection_upgrade;
    }

    location ^~ /onlyoffice/ {
        proxy_pass http://onlyoffice/;
        proxy_set_header X-Real-IP  $remote_addr;
        proxy_set_header X-Forwarded-For $proxy_add_x_forwarded_for;
        proxy_set_header X-Forwarded-Host $host/onlyoffice;
        proxy_set_header X-Forwarded-Proto $scheme;
        proxy_set_header Host $host;
        proxy_set_header Upgrade $http_upgrade;
        proxy_set_header Connection $connection_upgrade;
        proxy_no_cache 1;
        proxy_cache_bypass 1;
    }
}
这里有个细节值得注意,反代onlyoffice的时候,proxy_pass http://onlyoffice/;末尾要加一个/。如果你不需要文档编辑,可以从文件中移除以下内容:
upstream collabora {
    server 127.0.0.1:9980;
    keepalive 32;
}

upstream onlyoffice {
    server 127.0.0.1:9981;
    keepalive 32;
}

server {
    ...
    # Static Files
    location ^~ /browser/ {
        proxy_pass http://collabora;
        proxy_set_header Host $http_host;
    }

    # WOPI Discovery URL and Capabilities
    location ^~ /hosting/ {
        proxy_pass http://collabora;
        proxy_set_header Host $http_host;
    }

    # Main WebSocket + Docs Management
    location ^~ /cool/ {
        proxy_pass http://collabora;
        proxy_set_header Host $http_host;
        proxy_set_header Upgrade $http_upgrade;
        proxy_set_header Connection $connection_upgrade;
    }

    location ^~ /onlyoffice/ {
        proxy_pass http://onlyoffice/;
        proxy_set_header X-Real-IP  $remote_addr;
        proxy_set_header X-Forwarded-For $proxy_add_x_forwarded_for;
        proxy_set_header X-Forwarded-Host $host/onlyoffice;
        proxy_set_header X-Forwarded-Proto $scheme;
        proxy_set_header Host $host;
        proxy_set_header Upgrade $http_upgrade;
        proxy_set_header Connection $connection_upgrade;
        proxy_no_cache 1;
        proxy_cache_bypass 1;
    }
}
启用站点:
ln -s /etc/nginx/sites-available/sync-in /etc/nginx/sites-enabled/sync-in签发证书:
certbot --nginx我上传了多种不同格式的文件,文档、PDF、图片等等,全部都可以正常预览、打开、下载、分享:


最后补充点内容,其实collabora和onlyoffice只选择部署一个就行了,我个人更推荐onlyoffice,无论是UI/UX还是响应速度,onlyoffice都是吊打collabora的。当你两个同时部署的时候,会弹出选择框,让你选择用哪个打开:

2026-06-06 11:39:36
前段时间在红迪偶然发现一款叫suroi.io的2D网页吃鸡游戏,玩了下觉得还挺好玩的,就是特别卡,哪怕直连官方的亚洲服务器还是卡,而且官方服务器不让使用VPN。。这种PVP游戏菜是原罪,卡更是原罪。。
后面发现这个游戏是可以自建服务器的,我就折腾了一下,但是不知道是哪里的问题,服务端一直跑不起来。。然后搜索平替又找到了survev.io,这个也可以自建服务器,玩法都是差不多的,而且survev还有用户、战绩、排行榜系统。最重要的是我搭建起来了。。
这篇文章记录下搭建survev.io游戏服务器的步骤,说实话坑有点多= =
1.建议使用Debian 13等新系统,我一开始用Debian 11遇到这个问题#206
2.建议使用mise环境管理工具来管理Node.js、pnpm。因为我换到Debian 13后又怕它对这些东西有版本要求,我用mise的话可以管理多版本,如果它不支持某个版本我可以随时切换。
3.如果需要启用用户、战绩、排行榜系统,则还需要安装PostgreSQL数据库,但是survev对数据库的库名、数据库用户名、密码都是硬编码的,不要自己乱改。。否则大概率连不上数据库。。不过也不用担心安全问题,因为Debian官方repo安装的PostgreSQL数据库默认只监听在127.0.0.1,密码设不设都无所谓。
4.用户注册、登录功能,需要提前准备Google或者Discord OAuth2密钥,我这里使用的是Discord,这个沙雕Discord的登录界面在谷歌Canary浏览器打不开一直白屏,让我以为是自己的配置哪里配错了,浪费了很多时间。。
5.这是最坑的一个点,实际上这个游戏是分为客户端、API服务、游戏服务三个部分,官方的文档没给出反代游戏服务的配置,让我以为只用提供客户端资源、反代API服务就行了。。
准备域名:
survev.example.com # 用于客户端和API服务
asia.survev.example.com # 用于游戏服务
准备Discord OAuth2密钥,访问Discord开发者平台创建应用。
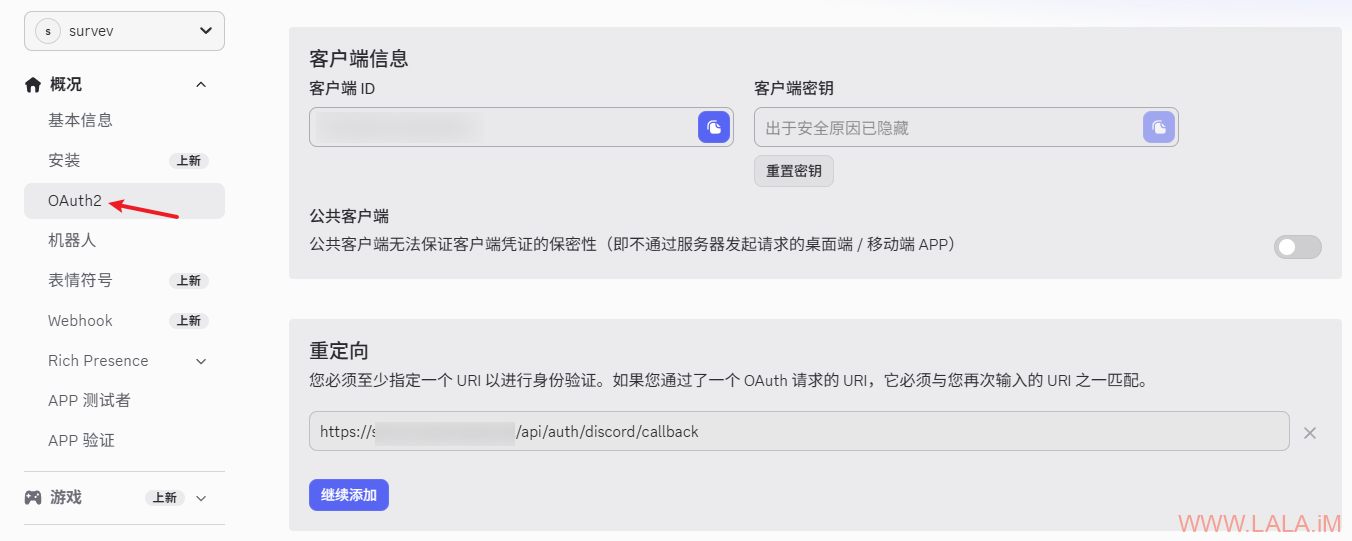
在左侧点击OAuth2,将客户端ID、客户端密钥复制保存下来。重定向URI必须配置为:
https://survev.example.com/api/auth/discord/callback如图所示:
安装需要用到的软件包:
apt update
apt install -y sudo curl git nginx python3-certbot-nginx postgresql
安装mise:
install -dm 755 /etc/apt/keyrings
curl -fSs https://mise.en.dev/gpg-key.pub | tee /etc/apt/keyrings/mise-archive-keyring.asc 1> /dev/null
echo "deb [signed-by=/etc/apt/keyrings/mise-archive-keyring.asc] https://mise.en.dev/deb stable main" | tee /etc/apt/sources.list.d/mise.list
apt update
apt install -y mise
激活mise:
echo 'eval "$(mise activate bash)"' >> ~/.bashrc重启shell会话使其生效,如果你用的是ssh客户端,就断开连接重新登录一遍。然后运行如下命令检查环境是否正常,回显“No problems found”就OK了:
mise doctor创建数据库和用户,用户名、密码、库名都不要改,保持默认的即可:
sudo -u postgres createuser survev
sudo -u postgres createdb survev -O survev
sudo -u postgres psql -c "ALTER USER survev WITH PASSWORD 'survev';"
也可以交互式设置密码,密码一定要设置成survev:
sudo -u postgres createuser survev -P
sudo -u postgres createdb survev -O survev
克隆项目代码:
cd /opt
git clone https://github.com/leia-uwu/survev.git
cd survev
使用mise创建项目所需要的环境:
mise use node@24
mise use pnpm
执行如下命令开始安装向导:
pnpm survev-setup请严格按照下面给出的选项进行配置,确保完全一致:
✔ Are you setting up a local development environment or a production server? · production
✔ Are you deploying a an API server, a game server region or both? · Both
✔ Would you like to import the API and loadout secret keys or use random ones? · random
✔ Is the API server behind a proxy? (e.g nginx or cloudflare) (y/N) · true
✔ Enter the proxy HTTP header · X-Real-IP
✔ Would you like enabling SSL for the API server? (y/N) · false
✔ Would you like to setup database support (required for accounts, IP bans, leaderboards etc) (Y/n) · true
✔ Enter the full base URL of the website for oauth2 redirects (eg: https://survev.io) · https://survev.example.com
✔ Would you like to add google login support (y/N) · false
✔ Would you like to add discord login support (y/N) · true
✔ Enter discord client ID · hidden
✔ Enter discord secret secret · hidden
✔ Would you like to setup the moderation bot? (y/N) · false
✔ Enter region ID (eg: na, eu, sa, as) · as
✔ Does this region support https? (Y/n) · true
✔ Enter region address · asia.survev.example.com
✔ Enter region translation key (eg: index-north-america, index-south-america) · index-asia
✔ Would you like to add another region? (y/N) · false
✔ Which region is this game server hosting? · as
✔ Enter the API server address · http://127.0.0.1:8000
✔ Is the game server behind a proxy? (e.g nginx or cloudflare) (y/N) · true
✔ Enter the proxy HTTP header · X-Real-IP
✔ Would you like enabling SSL for the game server? (y/N) · false
✔ Would you like to enable proxycheck.io to ban VPNs and proxies? (y/N) · false
最终生成的survev-config.hjson内容应该如下:
{
  secrets: {
    SURVEV_API_KEY:
    SURVEV_LOADOUT_SECRET:
    DISCORD_CLIENT_ID: ""
    DISCORD_SECRET_ID:
  }
  apiServer: {
    proxyIPHeader: X-Real-IP
  }
  database: {
    enabled: true
  }
  regions: {
    as: {
      https: true
      address: asia.survev.example.com
      l10n: index-asia
    }
  }
  gameServer: {
    thisRegion: as
    apiServerUrl: http://127.0.0.1:8000
    proxyIPHeader: X-Real-IP
  }
  oauthRedirectURI: https://survev.example.com
}
构建客户端和服务端(API/游戏服务):
pnpm build请确保构建目录具有正确的权限:
chown -R www-data:www-data /opt/survev/client/dist迁移数据库:
cd server/
pnpm run db:generate
pnpm run db:migrate
开两个终端启动API和游戏服务测试,确保正常运行后,按ctrl+c退出运行:
pnpm start:api
pnpm start:game
创建API服务的systemd单元配置文件:
nano /etc/systemd/system/survev-api.service写入如下内容:
[Unit]
Description=survev api server
After=network.target

[Service]
Type=simple
WorkingDirectory=/opt/survev/server
ExecStart=/usr/bin/mise exec -- pnpm start:api
Restart=on-failure

[Install]
WantedBy=multi-user.target
创建游戏服务的systemd单元配置文件:
nano /etc/systemd/system/survev-game.service写入如下内容:
[Unit]
Description=survev dedicated game server
After=network.target

[Service]
Type=simple
WorkingDirectory=/opt/survev/server
ExecStart=/usr/bin/mise exec -- pnpm start:game
Restart=on-failure

[Install]
WantedBy=multi-user.target
启动API和游戏服务并设置开机自启:
systemctl enable --now survev-api
systemctl enable --now survev-game
新建NGINX站点配置文件,用于反代客户端和API服务:
nano /etc/nginx/sites-available/survev-api写入如下内容:
server {
    listen [::]:80;
    listen 80;
    server_name survev.example.com;

    # Static files cache
    location ~* \.(js|css|jpg|jpeg|png|gif|js|css|ico|svg)$ {
        expires 1y;
        etag off;
        if_modified_since off;
        add_header Cache-Control "public, no-transform";
        root /opt/survev/client/dist;
    }

    location ~* \.(html)$ {
        etag on;
        add_header Cache-Control "no-cache";
        root /opt/survev/client/dist;
    }

    # Client build
    location / {
        root /opt/survev/client/dist;
    }

    # API server
    location /api {
        proxy_http_version 1.1;
        proxy_set_header X-Real-IP $remote_addr;
        proxy_set_header X-Forwarded-Host $remote_addr;
        proxy_set_header X-Forwarded-For $proxy_add_x_forwarded_for;
        proxy_set_header X-Forwarded-Proto $scheme;
        proxy_set_header Host $http_host;
        proxy_pass "http://127.0.0.1:8000";
    }

    location /private {
        proxy_http_version 1.1;
        proxy_set_header X-Real-IP $remote_addr;
        proxy_set_header X-Forwarded-Host $remote_addr;
        proxy_set_header X-Forwarded-For $proxy_add_x_forwarded_for;
        proxy_set_header X-Forwarded-Proto $scheme;
        proxy_set_header Host $http_host;
        proxy_pass "http://127.0.0.1:8000";
    }

    # Team WebSocket server
    location /team_v2 {
        proxy_http_version 1.1;
        proxy_set_header X-Real-IP $remote_addr;
        proxy_set_header X-Forwarded-Host $remote_addr;
        proxy_set_header X-Forwarded-For $proxy_add_x_forwarded_for;
        proxy_set_header X-Forwarded-Proto $scheme;
        proxy_set_header Host $http_host;
        proxy_set_header Upgrade $http_upgrade;
        proxy_set_header Connection "Upgrade";
        proxy_pass "http://127.0.0.1:8000";
        proxy_redirect off;
    }
}
新建NGINX站点配置文件,用于反代游戏服务:
nano /etc/nginx/sites-available/survev-game写入如下内容:
server {
    listen 80;
    listen [::]:80;
    server_name asia.survev.example.com;

    location / {
        proxy_http_version 1.1;
        proxy_set_header Upgrade $http_upgrade;
        proxy_set_header Connection "upgrade";
        proxy_set_header X-Real-IP $remote_addr;
        proxy_set_header X-Forwarded-For $proxy_add_x_forwarded_for;
        proxy_set_header X-Forwarded-Proto $scheme;
        proxy_set_header Host $http_host;
        proxy_pass "http://127.0.0.1:8001";
    }
}
启用两个站点:
ln -s /etc/nginx/sites-available/survev-api /etc/nginx/sites-enabled/survev-api
ln -s /etc/nginx/sites-available/survev-game /etc/nginx/sites-enabled/survev-game
签发证书:
certbot --nginx访问survev.example.com,如果不登录Discord就是通过访客身份玩,访客不支持统计数据等功能,自定义一个游戏内的名字(昵称)即可进入游戏:

通过Discord登录后,可以体验完整的功能,包含统计数据、个人任务、排行榜等:

这里有个值得注意的地方是,Discord登录后依旧支持你自定义游戏内的名字(昵称),并且排行榜数据是根据游戏内的名字(昵称)来排列的,但无论你使用什么昵称,最终都会指向你的个人统计页面:

所以在使用Discord登录后,建议每次进入游戏前都使用同一个昵称,这样可确保排行榜数据与账号一致。
游戏画面:

2026-06-03 12:37:53
Anubis介绍(摘自项目页面):
Anubis是一款Web防火墙,它使用一个或多个挑战来衡量您的连接安全性,以保护上游资源免受爬虫机器人的侵害。该项目旨在帮助保护小型互联网免受人工智能公司源源不断的请求冲击。Anubis力求轻量级。
Anubis的推出相当于采取了核打击措施。这将导致您的网站无法被小型爬虫程序访问,并可能影响像 Internet Archive 这样的“优质机器人”。您可以配置机器人策略定义,将它们明确列入允许列表。我们正在努力完善一套精选的“已知优质”机器人,以便在可发现性和正常运行时间之间取得平衡。
大多数情况下,您不需要这样做,使用Cloudflare保护特定源站即可。但是,如果您无法或不愿使用 Cloudflare,Anubis可以满足您的需求。
简单总结:
不是完整的WAF,更像一个CloudFlare的挑战页面,主要用来防御爬虫,应该也能防御一定量的CC攻击。主要采用PoW机制进行挑战(也可以调整为别的挑战方式)
这篇文章记录下Anubis部署与NGINX集成的步骤,其实坑还是有点多的,如果你选择用套接字配置的话。。可能会遇到各种权限问题,以及各种奇葩BUG。。
Debian安装Anubis、NGINX、CertBot:
wget https://github.com/TecharoHQ/anubis/releases/download/v1.25.0/anubis_1.25.0_amd64.deb
apt install ./anubis_1.25.0_amd64.deb
apt update
apt install nginx python3-certbot-nginx
anubis的systemd单元配置文件采用多实例配置,意味着你可以同时运行多个anubis实例,并且官方推荐的是一个anubis实例对应保护一个上游服务。
假设现在要运行一个保护wordpress的anubis实例,复制一份默认的.env文件:
cp /etc/anubis/default.env /etc/anubis/wordpress.env编辑.env文件:
nano /etc/anubis/wordpress.env写入如下内容:
BIND=/run/anubis/wordpress/instance.sock
BIND_NETWORK=unix
SOCKET_MODE=0777
DIFFICULTY=5
METRICS_BIND=:9090
SERVE_ROBOTS_TXT=0
POLICY_FNAME=/etc/anubis/wordpress.botPolicies.yaml
TARGET=unix:///run/nginx-wordpress.sock
因为我用了套接字配置,这里遇到了很多坑,我详细说一下吧。。
1. BIND=套接字的路径必须是:
/run/anubis/{path}/instance.sock不能用官方文档指出的路径:
/run/anubis/instance.sock否正你会遇到permission denied报错:
"level":"INFO","msg":"failed to bind to unix:/run/anubis/instance.sock: listen unix /run/anubis/instance.sock: bind: permission denied"}原因是systemd单元配置文件里面有一行这个配置导致的,见此issue:
RuntimeDirectory=anubis/%i2. SOCKET_MODE=权限务必设置为0777或者0666。默认是0770,这意味着其它用户没有权限访问套接字,Debian的NGINX worker进程默认使用www-data用户运行,与anubis运行使用的用户不相同也不在同一个组里面,所以必须为其它用户设置6(读/写)或者7(读/写/执行)权限,否则NGINX会没有权限访问anubis的套接字。
为什么不把www-data加到同一个组里面?或者把NGINX worker改为anubis相同的用户运行?因为systemd单元配置文件里面有一行这个配置:
DynamicUser=yes这代表anubis运行时使用的是动态用户,你不知道它运行时会使用什么用户/组。而且这样操作也不够优雅。
接下来复制默认的策略文件:
cp /usr/share/doc/anubis/botPolicies.yaml /etc/anubis/wordpress.botPolicies.yaml我没有用默认的策略文件,因为里面有很多我不需要用到的规则,所以我自己搓了一份配置:
bots:
  # RSS Feed 放行
  - name: allow-feed
    path_regex: ^/feed/?$
    action: ALLOW

  # 静态资源放行,避免反复 challenge
  - name: allow-static
    path_regex: \.(css|js|jpg|jpeg|png|gif|svg|ico|webp|woff|woff2|ttf)$
    action: ALLOW

  # robots.txt 放行
  - name: allow-robots
    path_regex: ^/robots\.txt$
    action: ALLOW

  # favicon 放行
  - name: allow-favicon
    path_regex: ^/favicon\.ico$
    action: ALLOW

  # 放行正常搜索引擎
  - import: (data)/crawlers/_allow-good.yaml

  # 保持互联网正常工作(ACME/健康检查等)
  - import: (data)/common/keep-internet-working.yaml

  # 明显自动化工具直接拒绝
  - name: deny-bad-useragents
    user_agent_regex: ^$|curl|wget|python|httpclient|go-http-client|scrapy|nikto|sqlmap|masscan|zgrab|nmap
    action: DENY

  # 兜底 全站挑战 防CC攻击的关键
  - name: fallback
    path_regex: .*
    action: CHALLENGE
    challenge:
      algorithm: fast
      difficulty: 4
在搓规则的时候记住一个定律即可:anubis规则是从上到下依次匹配的。第一个规则不匹配才会进入到下一个规则再次进行匹配,以此类推。
启动anubis:
systemctl enable --now [email protected]配置NGINX站点:
nano /etc/nginx/sites-available/wordpress我的完整配置如下:
upstream anubis-wordpress {
  server unix:/run/anubis/wordpress/instance.sock;
}

server {
  server_name anubis.example.com;
  listen [::]:443 ssl ipv6only=on http2; # managed by Certbot
  listen 443 ssl http2; # managed by Certbot
  ssl_certificate /etc/letsencrypt/live/anubis.example.com/fullchain.pem; # managed by Certbot
  ssl_certificate_key /etc/letsencrypt/live/anubis.example.com/privkey.pem; # managed by Certbot
  include /etc/letsencrypt/options-ssl-nginx.conf; # managed by Certbot
  ssl_dhparam /etc/letsencrypt/ssl-dhparams.pem; # managed by Certbot

  location / {
    proxy_set_header Host $host;
    proxy_set_header X-Real-IP $remote_addr;
    proxy_set_header X-Http-Version $server_protocol;
    proxy_pass http://anubis-wordpress;
  }
}

server {
  listen unix:/run/nginx-wordpress.sock;
  server_name anubis.example.com;
  root "/var/www/wordpress";
  index index.html index.php;

  # 获取客户端真实IP
  set_real_ip_from unix:;
  real_ip_header X-Real-IP;

  location / {
    try_files $uri $uri/ /index.php?$args;
  }

  location ~ \.php$ {
    include snippets/fastcgi-php.conf;
    fastcgi_pass unix:/var/run/php/php7.4-fpm.sock;
  }
}

server {
  listen 80;
  listen [::]:80;
  server_name anubis.example.com;
    if ($host = anubis.example.com) {
        return 301 https://$host$request_uri;
    } # managed by Certbot
    return 404; # managed by Certbot
}流量的走向是:用户访问你的站点(80端口)301跳转到(443端口),然后流量进入anubis清洗,清洗后的流量通过unix:/run/nginx-wordpress.sock到达上游(后端服务)
如果你使用certbot管理证书,可以这样配置:
upstream anubis-wordpress {
  server unix:/run/anubis/wordpress/instance.sock;
}

server {
  listen 80;
  listen [::]:80;
  server_name anubis.example.com;

  location / {
    proxy_set_header Host $host;
    proxy_set_header X-Real-IP $remote_addr;
    proxy_set_header X-Http-Version $server_protocol;
    proxy_pass http://anubis-wordpress;
  }
}

server {
  listen unix:/run/nginx-wordpress.sock;
  server_name anubis.example.com;
  root "/var/www/wordpress";
  index index.html index.php;

  # 获取客户端真实IP
  set_real_ip_from unix:;
  real_ip_header X-Real-IP;

  location / {
    try_files $uri $uri/ /index.php?$args;
  }

  location ~ \.php$ {
    include snippets/fastcgi-php.conf;
    fastcgi_pass unix:/var/run/php/php7.4-fpm.sock;
  }
}
启用站点:
ln -s /etc/nginx/sites-available/wordpress /etc/nginx/sites-enabled/wordpress用certbot生成证书:
certbot --nginxcertbot会自动补全上述的完整配置,你就不需要自己去配置443那块的内容了。
这里我又遇到一个问题:由NGINX创建的套接字:unix:/run/nginx-wordpress.sock不会在NGINX重启或者停止后自动删除,这导致NGINX启动的时候失败,报错:
bind() to unix:/run/nginx-wordpress.sock failed (98: Address already in use)
bind() to unix:/run/nginx-wordpress.sock failed (98: Address already in use)
bind() to unix:/run/nginx-wordpress.sock failed (98: Address already in use)搜了一下发现这是一个11年前的BUG,并且在6年前似乎已经修复了,但是我不知道为什么Debian 11的NGINX 1.18还有这个BUG。。要临时解决的话见此答案
将SIGQUIT“优雅关闭”,改为SIGTERM“快速关闭”即可。编辑NGINX的systemd单元配置文件:
systemctl edit nginx在两段注释中间写入如下配置,写在其他地方是不会生效的哈,这也是systemd奇葩的地方= =:
[Service]
ExecStop=
ExecStop=-/sbin/start-stop-daemon --quiet --stop --retry TERM/5 --pidfile /run/nginx.pid
重启:
systemctl restart nginx效果如图,说真的这个二次元吉祥物有点丑= =:

下面简单介绍一下多实例部署,多个实例通过.env文件区分:
cp /etc/anubis/default.env /etc/anubis/yourbackend.env
cp /usr/share/doc/anubis/botPolicies.yaml /etc/anubis/yourbackend.botPolicies.yaml
编辑.env:
nano /etc/anubis/yourbackend.env配置不同的套接字:
BIND=/run/anubis/yourbackend/instance.sock
BIND_NETWORK=unix
SOCKET_MODE=0777
DIFFICULTY=5
METRICS_BIND=:9090
SERVE_ROBOTS_TXT=0
POLICY_FNAME=/etc/anubis/yourbackend.botPolicies.yaml
TARGET=unix:///run/nginx-yourbackend.sock
启动anubis:
systemctl enable --now [email protected]NGINX也应该监听不同的套接字:
server {
  listen unix:/run/nginx-yourbackend.sock;
  server_name anubis.example.com;
  root "/var/www/wordpress";
  index index.html index.php;

  # Get the visiting IP from the TLS termination server
  set_real_ip_from unix:;
  real_ip_header X-Real-IP;
  ...
}
参考:
https://anubis.techaro.lol/docs/admin/native-install
https://anubis.techaro.lol/docs/admin/installation#environment-variables
https://anubis.techaro.lol/docs/admin/environments/nginx
https://anubis.techaro.lol/docs/admin/policies