
2026-09-23 00:05:39
我在 macOS 上日常用得最多的软件是 contexts,这是一个窗口 switcher,但这个软件似乎好几年都没更新了。我之前还发邮件去问过作者,他回复说一切都工作得很好,也没有什么新功能想法,所以就一直没更新。
然后某天我看到有的人用 Rust 实现了跨平台的输入法,于是我就起了个新坑,尝试用 AI 来帮我重新实现类似 Contexts 的工具,整个过程比较顺利,项目代码在 Winlane。
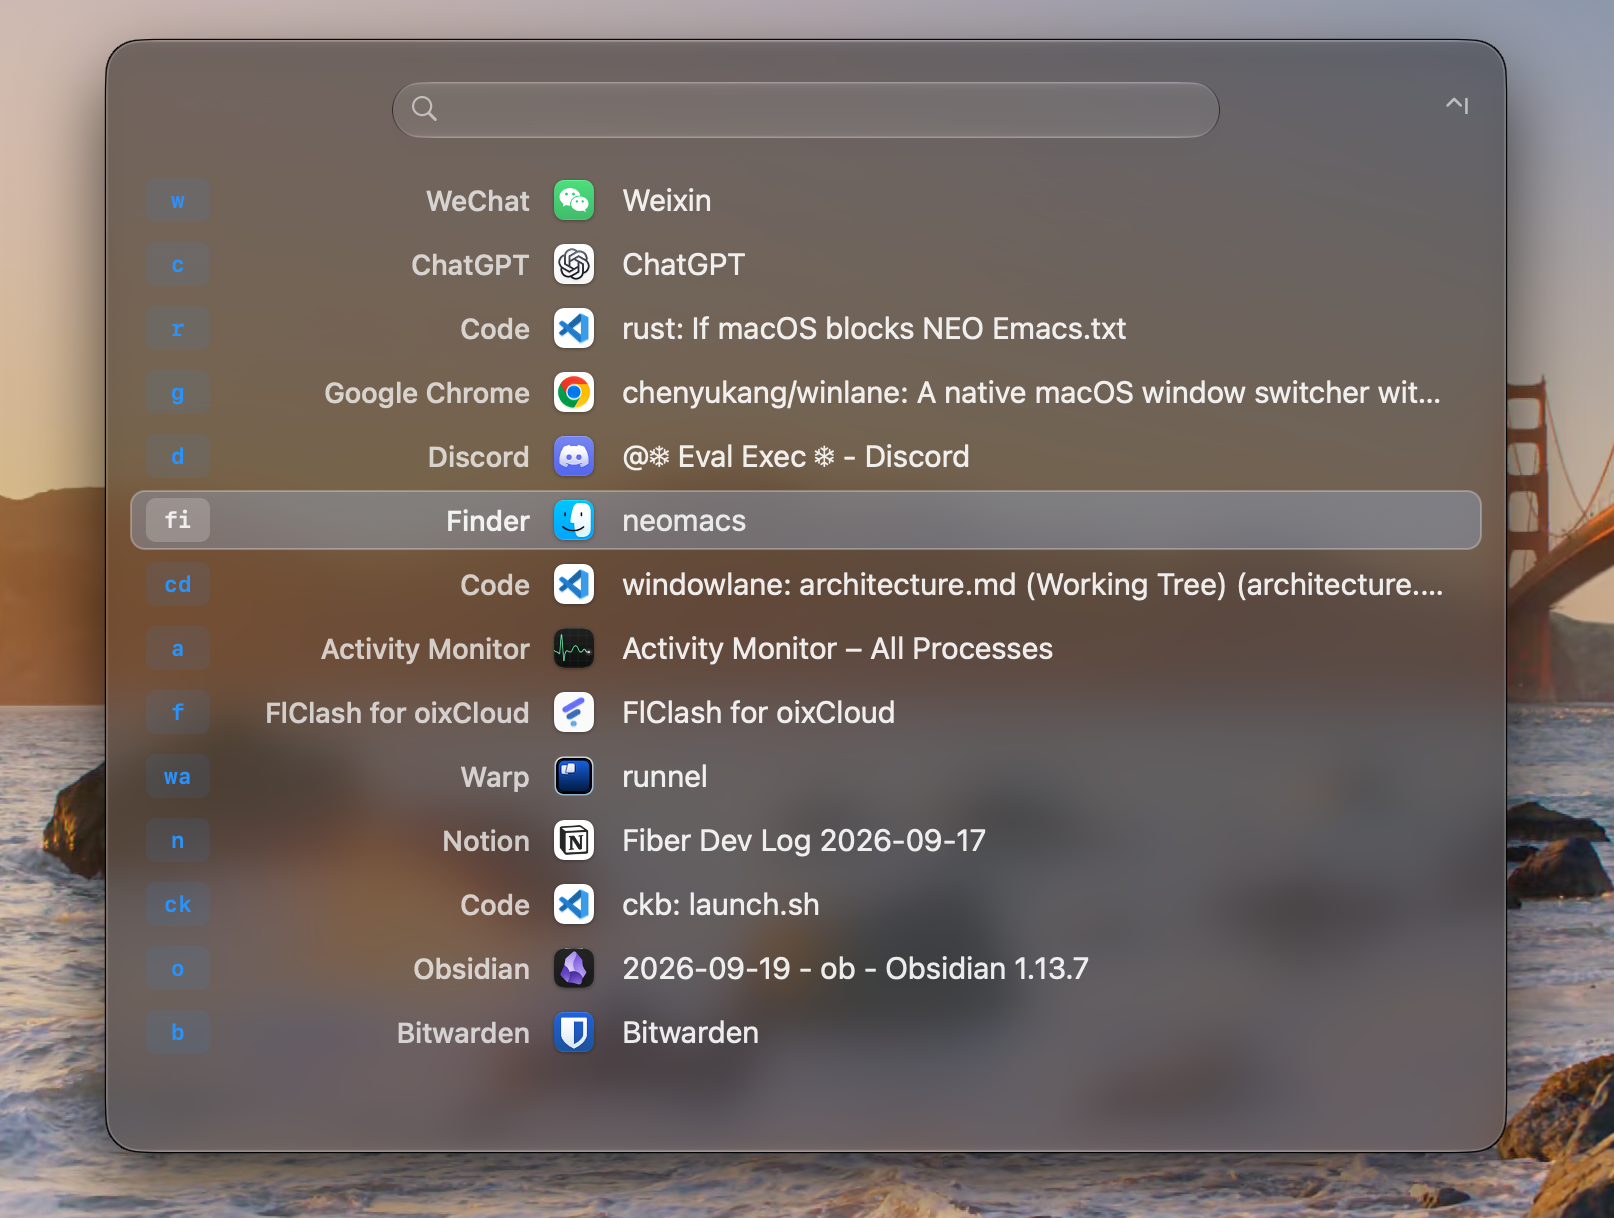
Contexts 有很多配置项,但我只用它最核心的窗口切换功能。而做完这些基础功能之后我又忍不住继续把我日常依赖的一些小工具都重新实现成了 Winlane 里面的命令。主要有:
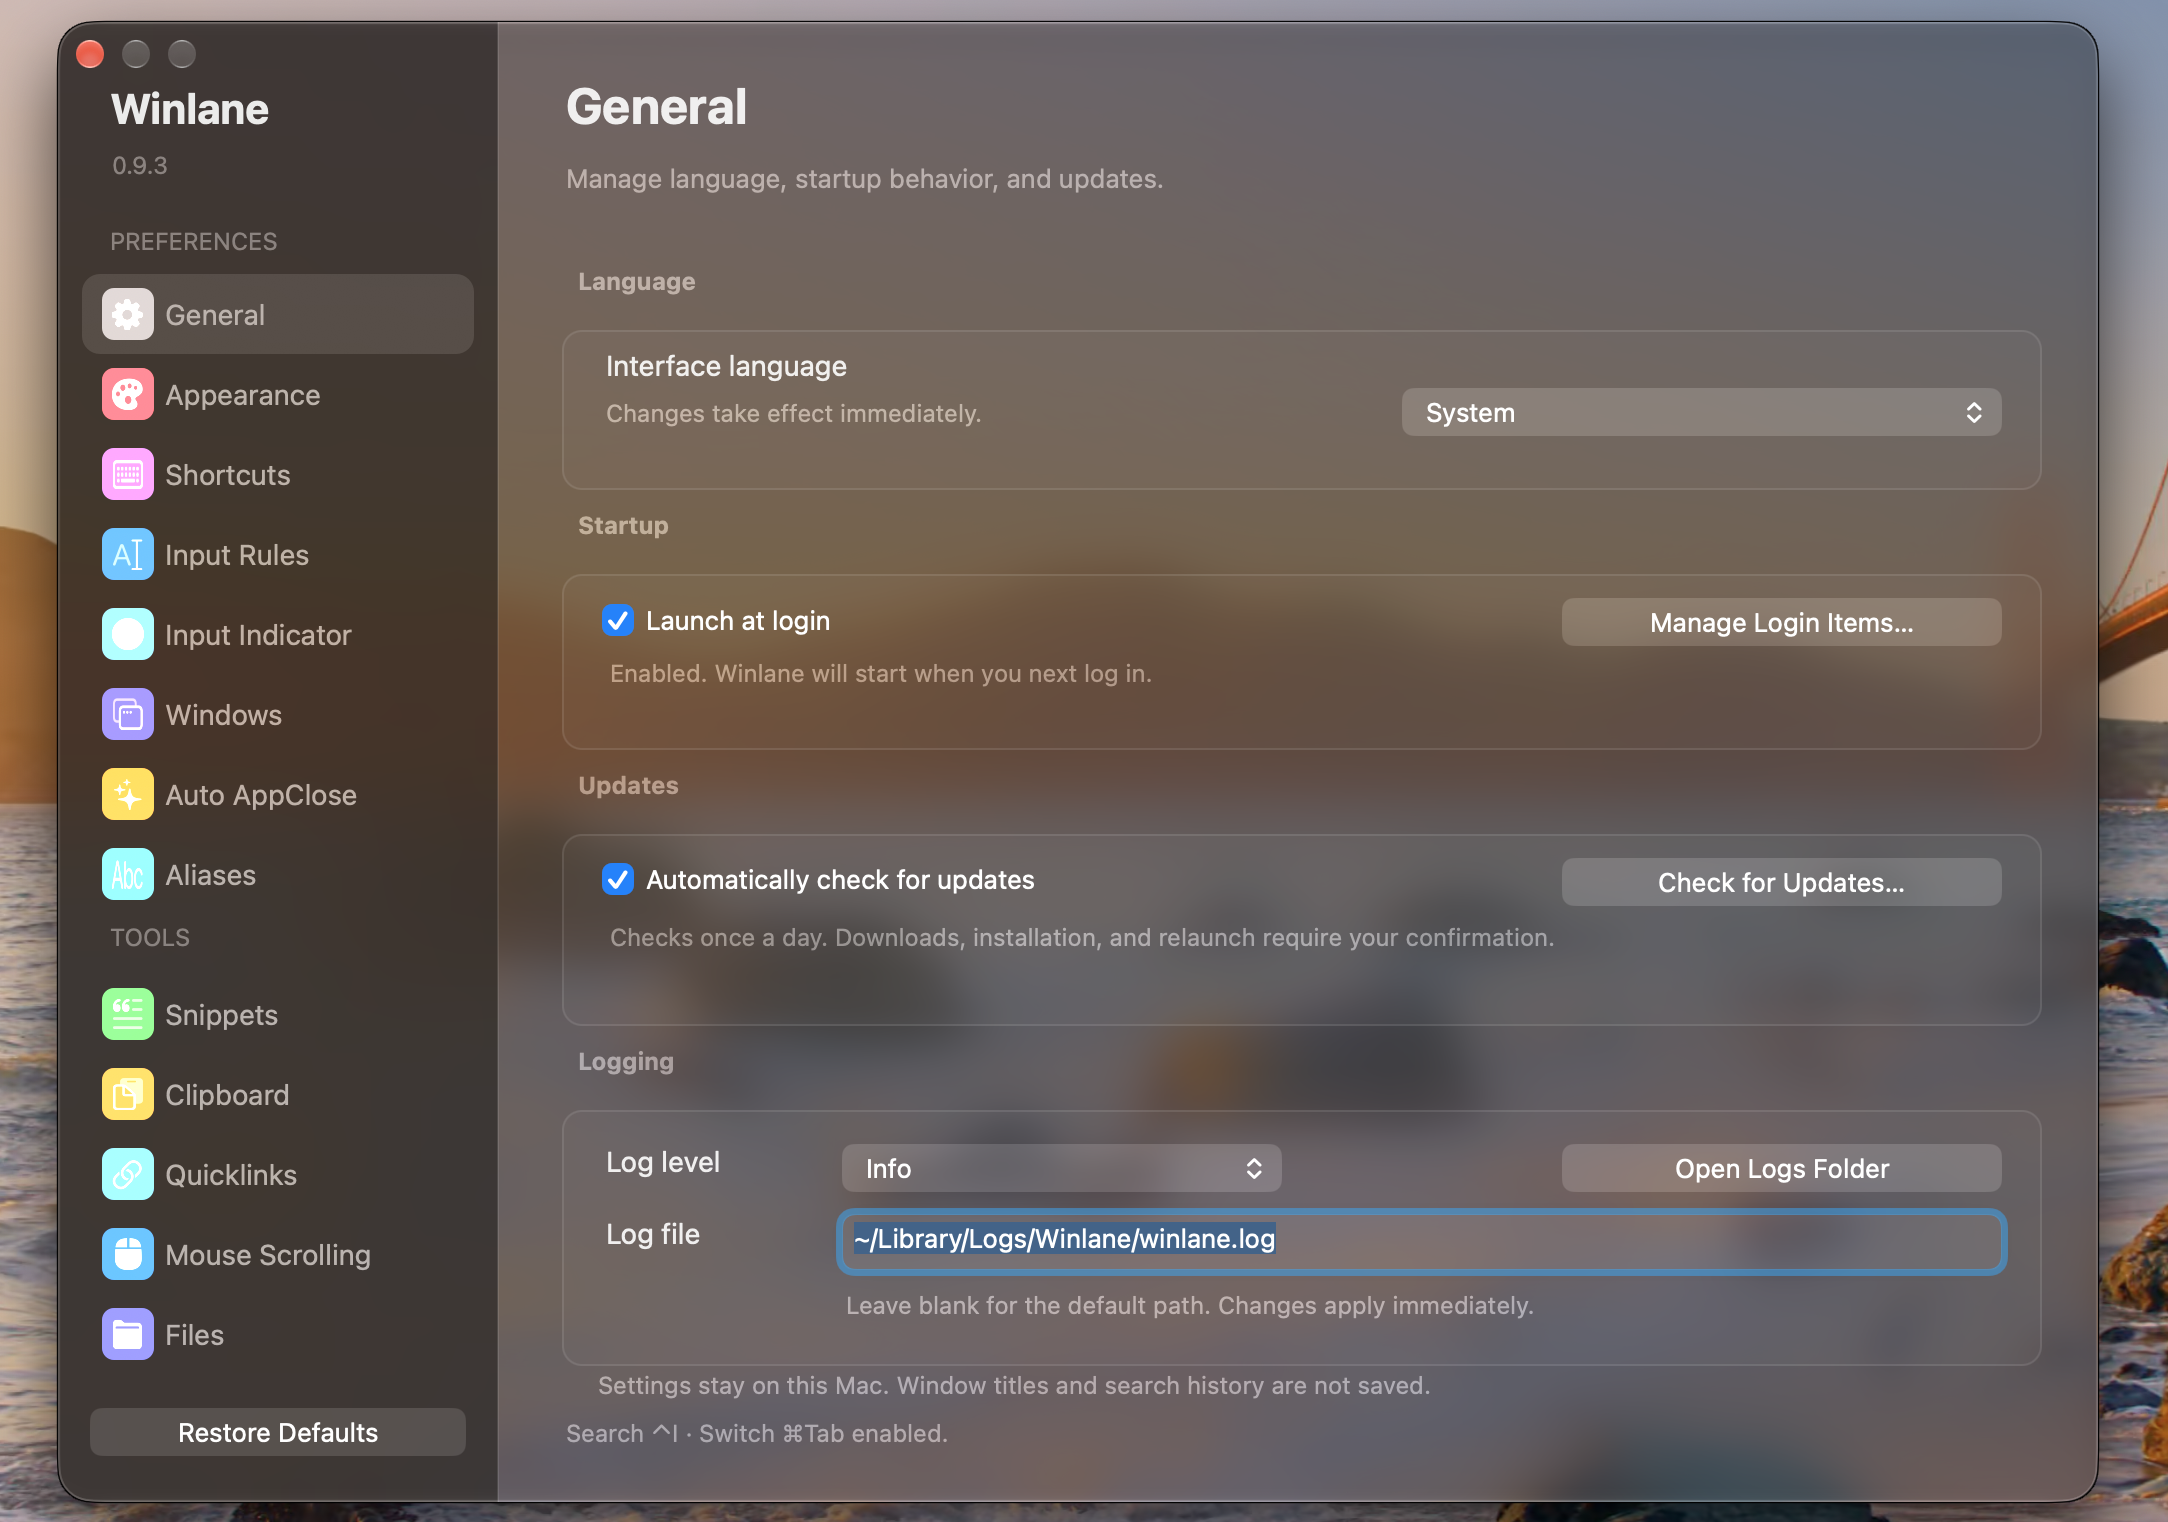
winlane 集合了这么多功能,而内存只占用 100 来 MB,我可以删掉这几个 App 了:

整个应用开发的过程中,没遇到什么麻烦的地方,倒是在两个小细节上反复折腾了几轮。
第一个是界面的响应速度。这种工具的响应速度直接影响使用体验,所以进入搜索模式需要立即展示 UI,然后优先使用缓存,异步去更新 items 列表的内容,窗口扫描、应用发现、项目数据库和浏览历史读取、搜索模式的焦点查询都放到后台。⌘Tab 为保证快速切换的准确性,保留有严格超时限制的前台窗口查询,重试留给后台。
另一个细节是,当我在其他应用中使用中文输入法时,按下 Ctrl + I 进入 Winlane 的搜索模式,然后我会迅速开始输入关键词或者 alias 查找窗口或者应用,但这时候中文输入法的候选窗会短暂弹出。虽然不是很影响使用,但是让我这个强迫症很难受。这点在 Raycast 上同样存在,只是既然这个工具是我自己来做的,而我使用过程中注意到了这点,所以就一直尝试让 AI 帮我试各种方案,我想要的就是无缝开始输入。最终这个问题还是彻底解决掉了,主要做了几层处理:
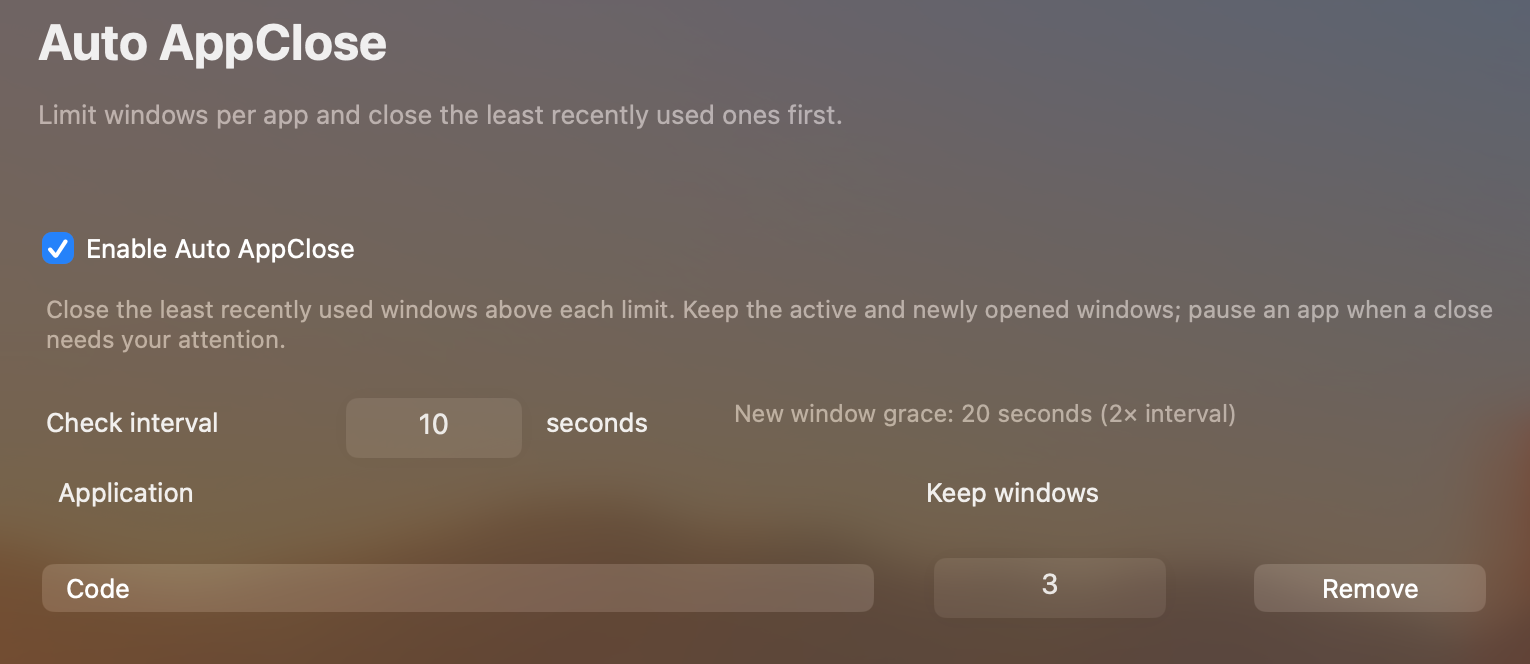
最近我还实现了另外一个小功能 auto-appclose,可以设置任何一个应用和限制数量,当这个应用的窗口数量超过限制时,自动关闭这个应用中最久没有使用的窗口。这个使用场景是 VS Code 打开多个项目的时候,每个项目都是一个窗口,如果我忘记关闭,内存就被多个 rust-analyzer 占得差不多了,所以设置为 3 就非常合适,这个小功能和我给浏览器实现的自动关闭 tab 的插件 auto-tabs 类似,确实解决了我的问题。
所以,目前这个工具有点像是 Windows 上的 PowerToys,就是一些顺手的小工具和配置的集合,如果你也和我一样在乎效率和这些小细节,欢迎尝试和贡献。
2026-08-21 12:46:23
这周我的 Mac 突然无法开机了,睡午觉之前我没插电让它继续跑程序,回来后就发现已经黑屏,无论如何充电都无法开机。用了 14 年 Mac 第一次出现这种情况,麻烦的是我暑假在湖南老家待着,发现整个地级市都没办法修复 Mac,无奈寄去长沙的苹果售后修理。
但这两天我还有些工作需要处理,所以就在家人的 PC 机上开始重建我的工作流程和工具。这时候才想起,我应该是有份比较新的配置备份。然后直接从 GitHub 的私有库上拉取下来,交给 AI 帮我恢复配置,一切都方便多了。
完成这次备份的小工具是 dotr,几个月之前我 vibe coding 的。
那次的契机也是自己一个命令行失误,导致 .zshrc 完全覆盖了。我最早的备份就是一个 Git 仓库,把 .zshrc、.gitconfig、编辑器配置这些文件手工复制进去。后来用过各种 dotfiles 管理工具,也折腾过 symlink、bootstrap 脚本、chezmoi/yadm 这类更完整的方案。
这些工具都还行,但有的地方又不符合我的使用习惯,我的需求其实更偏“备份”而不是“配置部署系统”。我不太想把 home 目录变成一套复杂的模板工程,也不想每加一个配置就思考它应该如何 symlink、如何跨机器自动恢复。很多时候我只是想:这个文件对我有用,把它安全地放进一个 Git 仓库里,以后坏了能找回来。
于是写了一个小工具,发布到 crates.io 的 crate 叫 dotr-cli,安装后命令是 dotr:
cargo install dotr-cli
dotr 的核心思路很简单:把你指定的文件和目录复制到一个 Git 仓库里,同时保存一份 metadata,方便以后 restore。
初始化一个仓库:
dotr init ~/dotbackup --with-defaults --set-default
仓库结构大概是这样:
dotr.toml
files/
  home/
metadata/
  index.json
~/.zshrc 会被存到:
files/home/.zshrc
如果是 $HOME 之外的绝对路径,则会放到:
files/root/Library/example/hello/world
这个设计看起来朴素,但我挺喜欢。它没有要求真实文件必须变成 symlink,也不要求原来的目录结构适配工具。源文件仍然在它原来的位置,dotr 只是按配置把它们复制到备份仓库。
dotfiles 备份最麻烦的地方,是每个应用目录都不一样。有的目录里只有配置,有的目录混着缓存、session、数据库、token、日志和临时文件。粗暴地备份整个 .config 基本等于把垃圾也一起提交了。
所以 dotr 的配置主要围绕 [[path]] 和 [[path_set]]:
[[path_set]]
base = "~"
items = [
  ".gitconfig",
  { src = ".config/nvim", include = ["init.lua", "lua/**", "after/**"] },
  { src = ".config/some-app", include = ["config.toml", "assets/**"], include_binary_file = true },
]
path_set 是为了让常见的 home-relative 配置写起来更短。字符串等价于 { src = "..." },table 则可以继续加 include、exclude、encrypt、force 等字段。
默认策略会跳过缓存、日志、本地数据库、session、build output、临时文件、环境变量文件、私钥等内容。如果一个目录里只有几个文件值得备份,我更推荐显式写 include,而不是整个目录打包。
常用命令很少:
dotr status
dotr backup
dotr restore --diff ~/.ssh/config
dotr restore --apply ~/.zshrc
status 本质上是一次 dry-run backup:扫描配置的 source,比较当前文件和仓库里的备份,然后告诉你会新增、修改、删除什么。backup 则真正把变化写进去。
如果开启 Git 自动提交:
[git]
auto_commit = true
auto_push = false
commit_message = "chore(dotr): automated backup"
dotr 只会 stage 自己管理的路径:dotr.toml、files/、metadata/、recipients 和 .gitignore。这个细节很重要,因为 backup repo 里可能还有你手工放的 README 或其他文件,工具不应该顺手把用户未准备好的东西一起提交。
dotr add 也会顺手跑一次 scoped backup:
dotr add ~/.config/yazi
dotr add --encrypt ~/.npmrc
dotr add --force /Library/Logs/MCXTools.log
如果这次 add 实际不会备份任何东西,比如被默认规则全部跳过,它会失败,并给出 dotr add --force PATH 的提示,而不是悄悄把一条无效配置写进 dotr.toml。
备份工具还有一个危险操作:恢复。
dotr 的 restore 默认是 dry-run,必须加 --apply 才会写回原位置:
dotr restore ~/.zshrc          # 只预览
dotr restore --apply ~/.zshrc  # 真正恢复
如果目标文件已经存在,而且内容不同,默认不会覆盖,除非显式加 --force。如果只是想把某个加密文件临时解出来看看,也可以用 -o 输出到另一个路径:
dotr restore -o /tmp/ssh-config ~/.ssh/config
对于 $HOME 之外的绝对路径,恢复更严格,必须同时给 --apply 和 --allow-absolute:
dotr restore --apply --allow-absolute /Library/example/hello/world
我自己写这类工具时很在意“危险动作”。backup 可以勤快一点,restore 应该慢一点。尤其是配置文件,一次错误覆盖可能让一个环境很难排查。
很多配置文件里会混进 token、内部 URL、账号名、私有 endpoint。dotfiles 仓库如果要推到远程,这些东西就很尴尬。
dotr 支持对单个 path 显式开启 age 加密:
dotr keygen
dotr add --encrypt ~/.npmrc
对应配置大概是:
[encryption]
backend = "age"
recipients_file = "recipients"
identity = "~/.config/dotr/identity"

[[path]]
src = "~/.npmrc"
encrypt = true
这里没有依赖系统安装的 age 命令,而是直接用 Rust 的 age 实现完成 keygen、backup 和 restore。recipients 是公钥,可以进仓库;~/.config/dotr/identity 是私钥,必须像密码一样保存,不能提交。
我没有让 dotr 自动猜哪些文件应该加密。秘密的边界很难可靠推断,自动猜错反而危险。它只提供机制:你明确说这个 path 要加密,它才加密。
提醒:如果一个 secret 已经以明文进过 Git 历史,后来把 encrypt = true 打开,只能保护未来的备份文件,不能让历史记录自动消失。该 rotate 的 secret 还是要 rotate。
现实里的配置文件经常有一些“每次运行都会变”的字段:时间戳、计数器、last refresh、last seen。它们变化了,但并不代表这个配置有备份价值。如果每次 backup 都因为这些字段产生 diff,最后 Git 历史会很吵。
dotr 支持对 matched 文件做 compare-only normalization:
[[path]]
src = "~/.config/some-app"
include = ["config.toml"]
normalize = { match = "config.toml", drop_paths = ["runtime.last_updated"] }
它的关键点是 compare-only:不会改写源文件,也不会把备份仓库里的文件改成删字段后的版本。它只是在比较 hash 时,先把指定字段 drop 掉。如果只有这些字段变化,backup 就认为没有值得写入的新版本;如果后来真正的配置字段变化了,dotr 仍然会复制当前原始文件。
目前支持 TOML、JSON、txt、conf 的识别,TOML/JSON 可以按 dot path 删除字段,也支持 * 匹配一层对象,比如:
drop_paths = ["marketplaces.*.last_updated"]
如果只靠手动运行 dotr backup,最后大概率会忘。
所以 dotr 有 watch 模式:
dotr watch
它会监听配置里的 source path,做 debounce,再按 backup_interval_secs 控制备份频率。也可以用 daemon 命令在后台跑:
dotr daemon start
dotr daemon status
dotr daemon restart
dotr daemon stop
这里我没有做 systemd unit 或 launchd plist。dotr daemon start 会解析 repo,写一个用户级 daemon config,记录当前 dotr executable 和 repo,然后启动 dotr --repo <repo> watch 到后台。日志默认写到:
~/.local/state/dotr/dotr-watch.log
有些东西不是直接复制现有文件就能备份的。比如 Homebrew 包列表、VS Code 扩展列表、某些工具的导出配置。
dotr 用 [[custom_backup]] 处理这类场景:
[[custom_backup]]
name = "homebrew"
backup = "brew bundle dump --file ~/.config/homebrew/Brewfile --force"
restore = "brew bundle --file ~/.config/homebrew/Brewfile"
paths = ["~/.config/homebrew/Brewfile"]
backup 前先跑 backup 命令,生成文件后再扫描;restore 时文件恢复后再跑 restore 命令。
这让我不用把 Homebrew、VS Code、各种工具的“导出命令”写进单独脚本里,dotr 本身就能描述这个备份关系。
如果你需要跨机器模板、条件渲染、复杂 bootstrap、secret manager 集成,那些成熟工具可能更适合。dotr 更像一个保守的 copy-based backup tool:我列出想备份的东西,它定期复制到仓库。它也提供恢复功能,但能力比较基础。就我这次的实际体验而言,直接把备份交给 AI 恢复更方便,AI 还能顺手处理一些跨平台问题。
2026-06-22 20:51:12
A few years ago I built a tiny personal tool called Obweb. Its purpose was dead simple: open a browser, type a quick thought, and append it to my Obsidian notes.
Then one day the VPS was shutdown for some reasons, I need to redeploy it on another VPS and it involve some extra boring stuff, such as rebind a sub-domain and configing on VPS. I’m too lazy for this. Obweb slowly became unmaintained since it was developed in JavaScript when I tried to pick some frontend stuff, and I hate JavaScript, luckly, I don’t need to learn it since AI is good at frontend.
I tried going back to the official Obsidian Android app one year ago, but it still felt too heavy for the thing I wanted most: fast capture. It takes too long to open, slow to respond, and I remember Termux is needed for some automatic tasks. I just don’t like it. I am clearly not the only one who feels this way, because I still randomly get emails from people asking about Obweb.
Recently I read an article about self-hosting Bitwarden with Tailscale. That reminded me that Obweb was almost made for this style of deployment. It does not need to live on a VPS. It can just run on my local dev machine, reachable from my own devices, without a public-domain, a nginx or another server to babysit.
So I rewrote it, in the vibe coding way. The new app is called Obr.
Obr is very much a tool shaped around my own workflow. But I think that is also what makes it worth writing about: small personal tools are often where the most honest product decisions happen.
The basic idea is straightforward. Obr puts a lightweight Web interface in front of an Obsidian vault, with search, capture, and editing for the parts I use most often.
Its config points at a few vault-relative paths:
vault_path = "/path/to/obsidian/vault"
daily_dir = "Daily"
entry_dir = "Posts"
image_dir = "Pics"
todo_path = "Posts/todo.md"
annotation_dir = "annotations"
Daily notes go into Daily/YYYY-MM-DD.md, Images live under Pics/. RSS annotations are just Markdown files under annotations/. Obr does not try to invent a new storage model. It stays close to the vault.
The original reason for Obr was capture.
On my phone, I want to open a page, write a few lines, pick a path, optionally attach a link or image, and submit. The backend appends the content to the right Markdown file. A daily note goes into today’s file. A regular entry goes under the configured entry directory. A todo goes into the todo file. By the way, I have found Hermes is also good fit for this kind of thing with proper training.
Image uploading is the one part that needs a little more care. Uploading through Tailscale is not always fast, and mobile networks are not exactly famous for being polite. So Obr has offline drafts and a sync outbox. If a request fails, the note should not disappear. It should sit locally and retry quietly in the background.
That is the kind of feature that sounds boring until the first time it saves a paragraph you wrote on the subway.

I use Chrome’s “Add to Home screen” to put Obr on my phone as an app icon, and I allow it to keep running in the background. That alone makes the whole thing feel much closer to a small mobile app than a web page I occasionally visit.
Under the hood, Obr uses a service worker and a manifest. The shell of the app, along with its CSS and JavaScript, can be cached locally. If the phone is offline, the app can still open, and recently viewed or edited content can often be restored from local cache. Anything that needs to write to the vault goes into the sync outbox when the network is down, then retries after the connection comes back.
The UI also shows the real connection state. Obr pings the backend and updates the online/offline indicator based on actual requests. The tiny dot in the top-right corner is easy to ignore, but it answers the important question: did this reach my vault, or is it still waiting on this device.
Images lazy-load so one article with several large screenshots does not clog the whole connection pool. Reading pages have a progress bar. The RSS detail page hides the top bar while scrolling. None of these are big features by themselves, but together they make the app feel much calmer on a phone.
Obr can render Markdown as HTML, and it can also show the raw file content. But for mobile editing, I wanted something smaller than a full editor.
Most of the time, I do not want to edit an entire article from my phone. I want to fix one sentence, delete one block, or check off one todo item. So Obr supports block-level editing. The backend splits a Markdown file into blocks, and the frontend can save or delete a single block without putting the whole document into a giant textarea.
This matters more than it sounds. Long-form editing on a phone is fragile: the cursor jumps, the keyboard covers half the screen, and suddenly you are questioning your stupid choice on editing something on a phone. Block editing keeps the task small, I am not editing a document, I am editing this paragraph.
Obweb had an RSS reader years ago, and I always missed it. Obr brings it back in a more complete form.
When RSS is enabled, Obr reads feed subscriptions from a file in the vault:
rss_enabled = true
rss_feeds_path = "Zero/feeds.md"
rss_data_dir = "data/rss"
rss_refresh_minutes = 30
rss_fetch_full_content = true
RSS metadata and read state are stored in a local SQLite database. Article bodies are cached under data/rss/content/. If full-content fetching is enabled, Obr uses rs-trafilatura to extract the page body into Markdown. If extraction fails, it falls back to the feed content or summary.

The RSS detail page also supports annotations. When I find a paragraph worth keeping, I can write a note beside it, and Obr saves that note as Markdown under annotations/.
Once RSS was local, adding AI summaries felt like the obvious next step.
Obr can generate Chinese summaries for newly fetched non-Chinese articles. It supports DeepSeek-based summary translation, and it can also translate the full text.
rss_ai_summary_enabled = true
rss_ai_summary_chars = 200
deepseek_api_key = "sk-..."
deepseek_model = "deepseek-v4-flash"

Obr can read and write my Obsidian vault, so security comes first.
At the moment it supports:
Origin and Sec-Fetch-Site checks for cross-site write requests.Obr’s init --tailscale command starts a separate userspace tailscaled, stores its state in $HOME/.local/share/tailscale-obr, and exposes the local 127.0.0.1:8010 service through a stable *.ts.net HTTPS address.
Tailscale can make the app reachable only inside my private network, which feels much better than putting it directly on the public Internet. The downside is that I need the Tailscale client and VPN running on my phone, and that conflicts with the VPN I normally use daily. So I do not always run Obr this way. Tailscale handles the secure device-to-device tunnel; Obr still handles login and authorization. Passkeys are a good fit for that on mobile.
The backend is Rust + Axum. The frontend is plain HTML, CSS, and JavaScript, no 3rd party frontend library, no npm. I hate npm.
Right now the project has about 15 Rust files, around 14,000 lines under src/ including test files, and 7 frontend asset files.
Most of my Mac development still happens with codex/gpt5.5, but a lot of Obr was built with hermes.
The workflow is strange in a good way: I notice something annoying while using the app, send a voice message to Hermes, wait a few minutes, and then double check it after the AI agent restarts the service automatically.
That may be the most interesting part of the project for me. Obr was not designed in a big upfront pass. It was shaped while I was using it, one small irritation at a time.
2026-05-08 00:44:46
五一期间我看到 dhh 发的一个帖子推荐 GitHub TUI: ghui,我安装试了一下,发现还需要安装 bun,另外功能看起来也不太够用。
我也看过 gh-dash,这东西是 gh 的一个 extension,我试了一下同样感觉体验不好,于是手痒开始让 AI 帮我用 Rust 重新写一个。
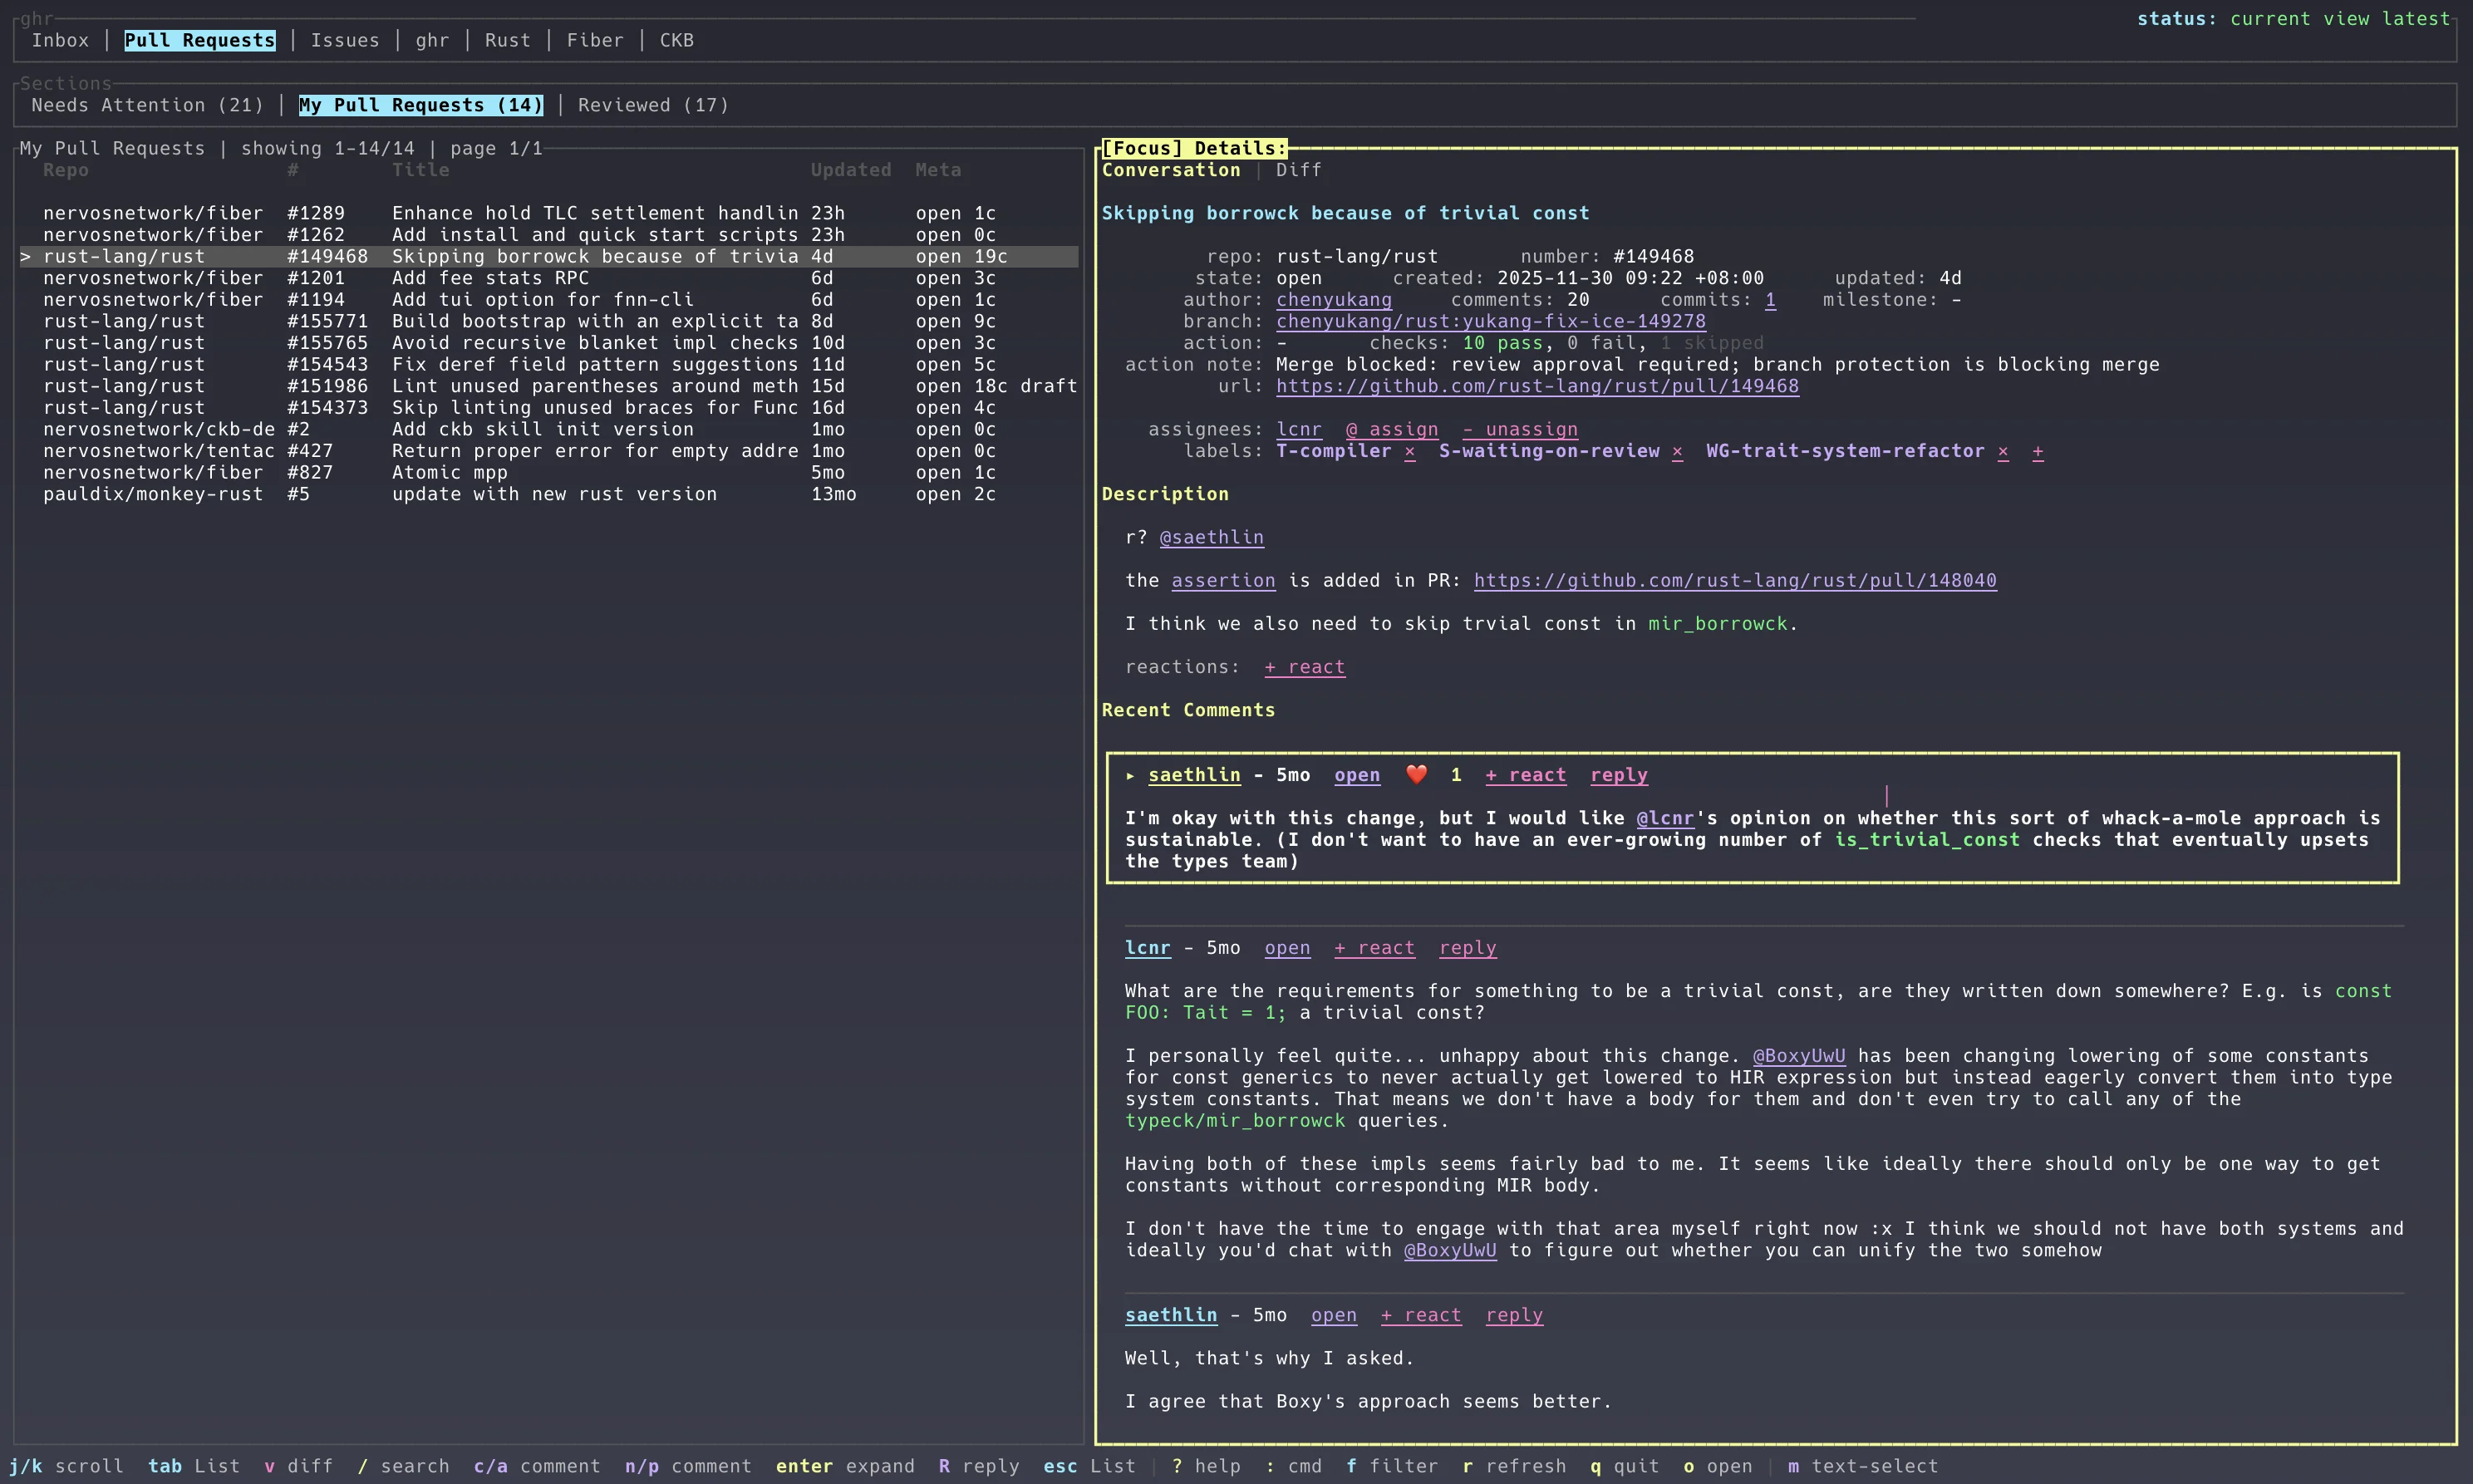
最近在工作中也写过一个 Rust 的 TUI 工具,感觉 Rust 的生态已经很成熟了,写起来也很顺手。于是就有了 ghr 这个项目。
它的目标一开始很简单:我想少在 GitHub 网页里来回点。作为一个经常看 PR、review 代码、处理 notification 的人,我每天会重复很多小动作:打开 inbox,看谁 @ 了我,扫一眼 assigned PR,点进 diff,读评论,偶尔 checkout 到本地验证一下。
这些动作单独看都不复杂,但它们很碎。浏览器适合处理一次性的探索,不太适合让我连续地做几十个维护动作。于是 ghr 慢慢变成了一个终端里的 GitHub 工作台。如果你喜欢 lazygit,那么应该也会喜欢 ghr,因为 lazygit 主要是针对 Git 相关的操作,而 ghr 主要是围绕 GitHub 上协作的 TUI,比如看 issue、comments、review 代码,merge PR 等等。我甚至想命名为 lazyhub,这样组合起来就是 GitHub 😅。
我最早在意的不是功能有多少,而是启动体验。
如果每次打开 TUI 都要等 GitHub API 慢慢返回,那这个工具很快就会被我自己弃用。终端工具有个很残酷的标准:它必须比打开网页更快,否则手会自动去点浏览器。
所以 ghr 现在是 snapshot-first。配置、数据库、日志和 UI 状态都放在 ~/.ghr 下面。启动时先把本地 SQLite 里的 snapshot 展示出来,然后再后台刷新当前列表。这样哪怕网络慢一点,至少我能先看到上次的现场。
这个设计听起来不酷,但它很实用,后来我又回看 ghui,发现他也改成了这个方案。
一开始它像一个 GitHub dashboard:Inbox、Pull Requests、Issues,几块列表摆出来。后面越写越发现,只看列表是不够的。
所以后面加了很多看起来很细的功能:
ghr 会自动把这个 project 加到顶层列表等等各种细节,这些功能单独拿出来都不像“大功能”,但组合起来以后,ghr 才开始有了工作流的味道。
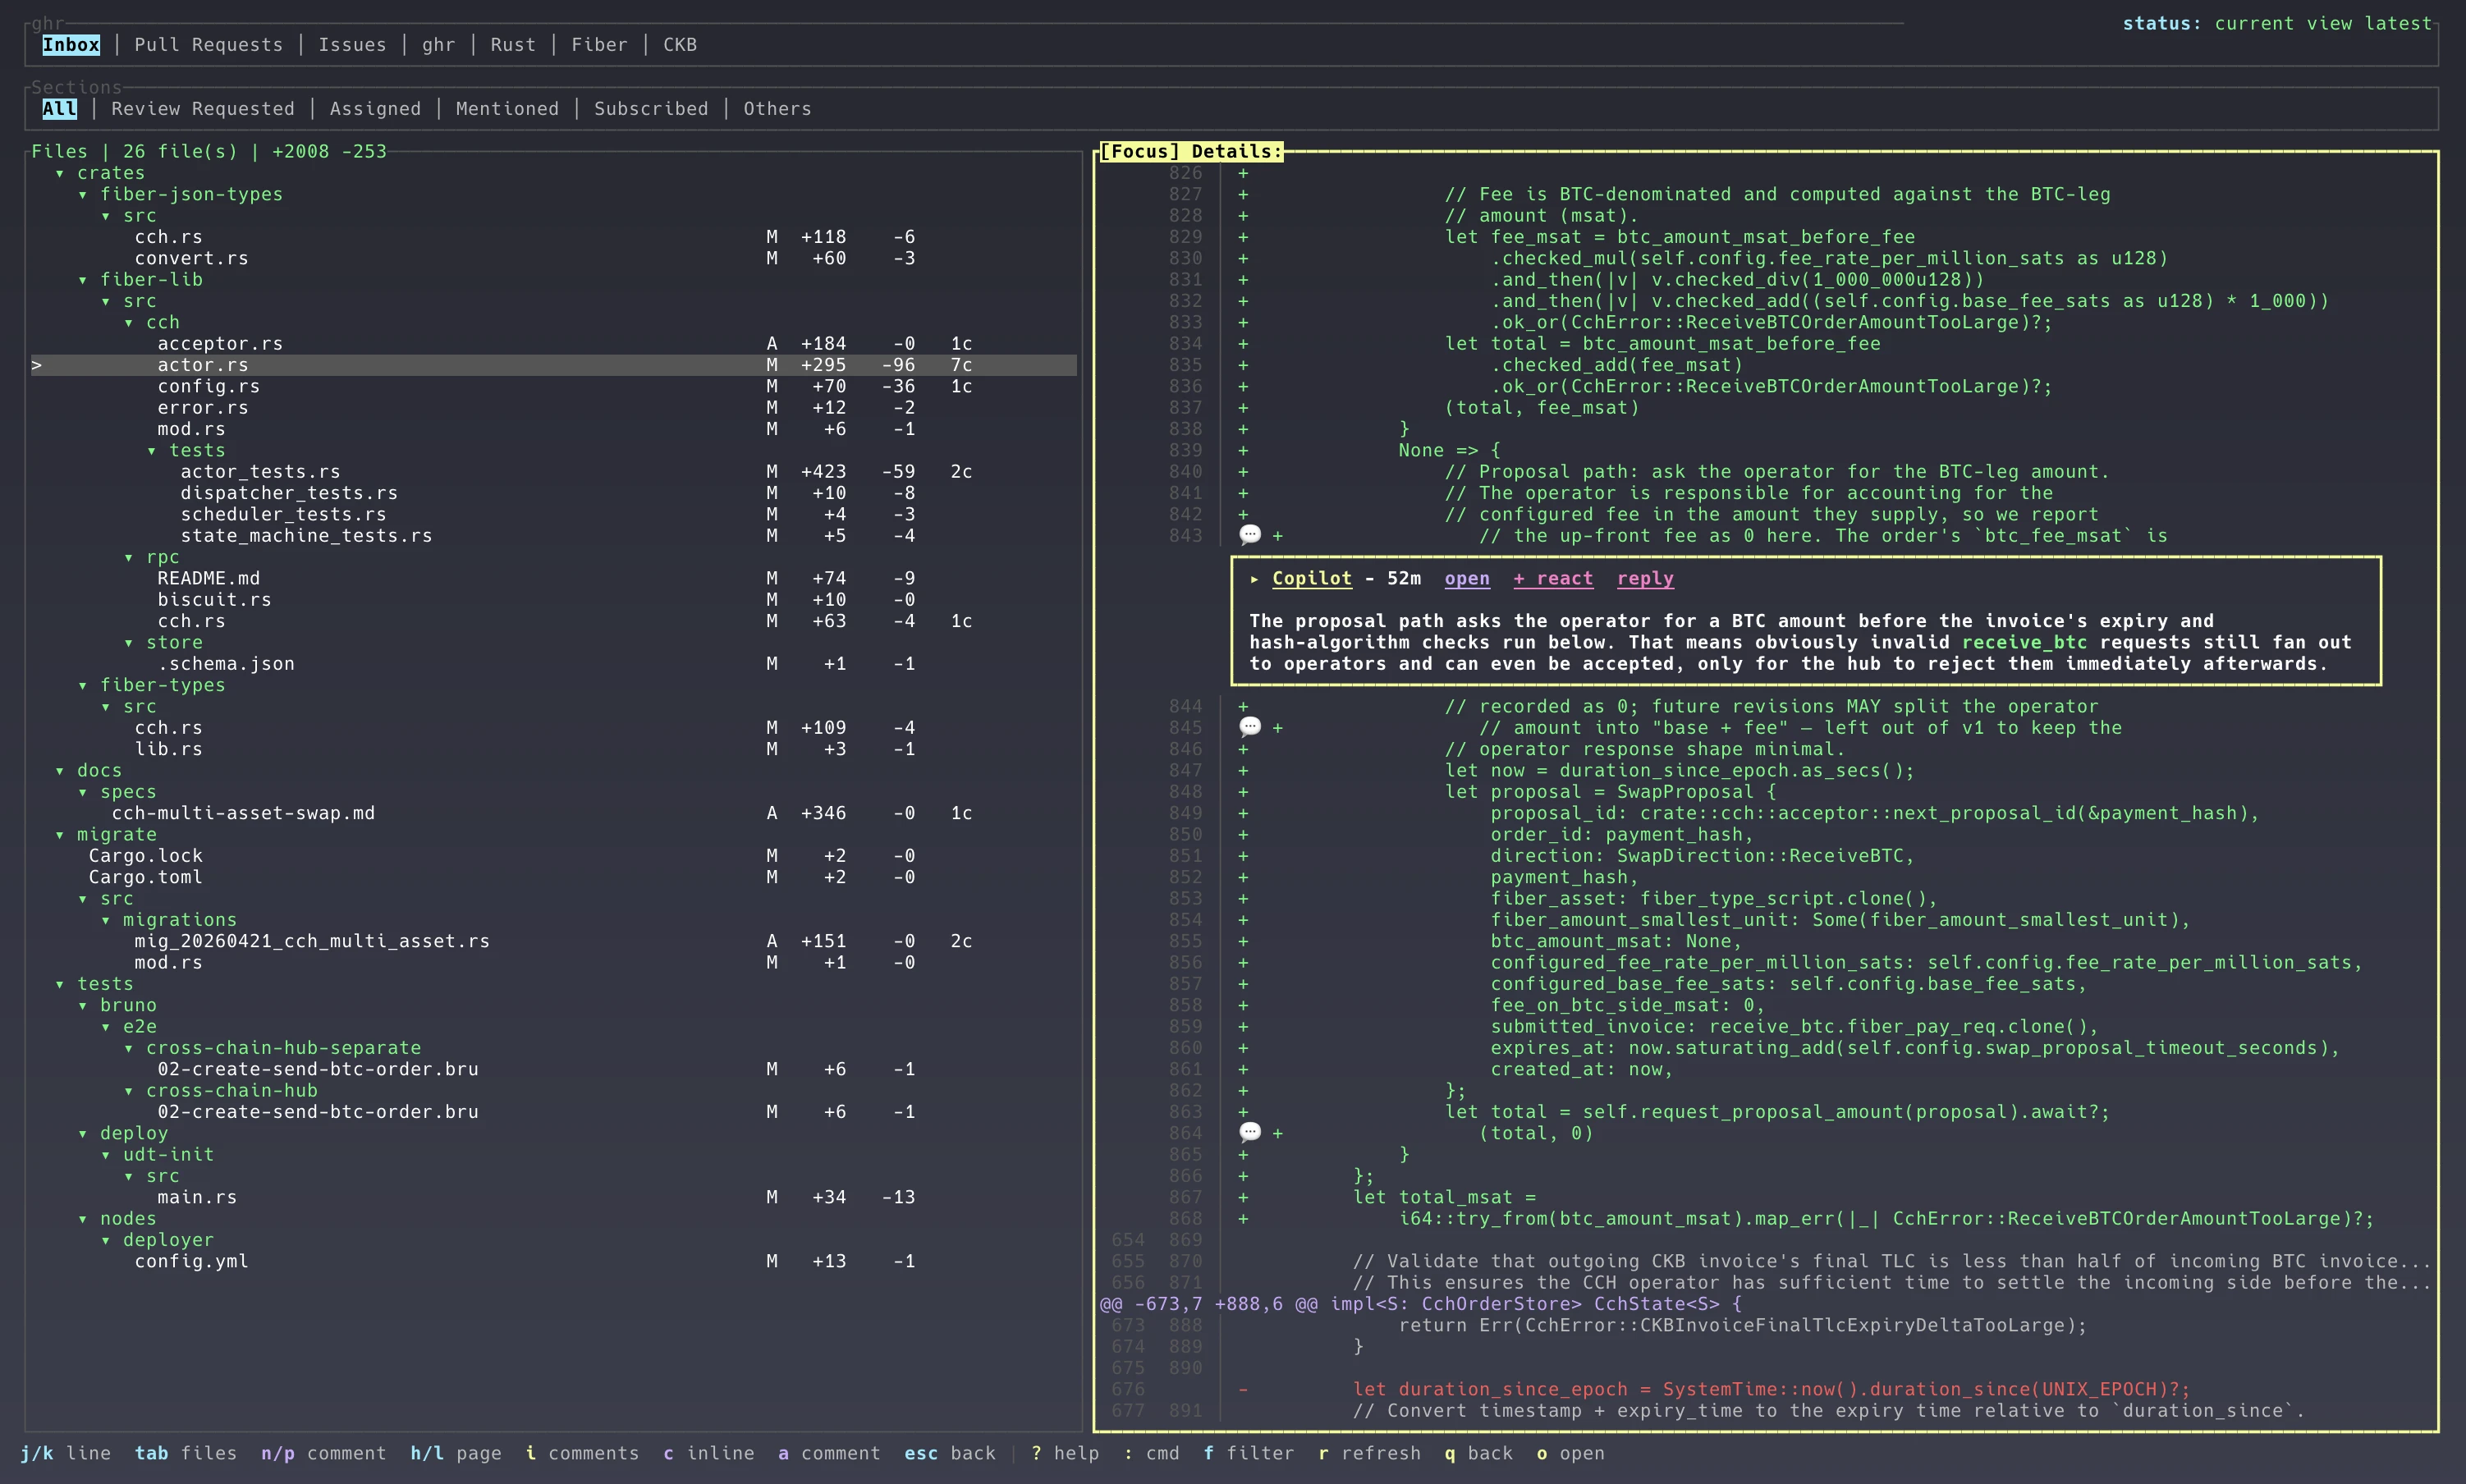
但我也发现 TUI 的局限,比如 diff 这个功能,即使我把细节都打磨好了,但我认为一个 PR 改动比较多的情况下最好的代码 review 体验还是在 VS Code 里,通过 Pull Request 插件直接 checkout 到本地,毕竟代码的 review 还是很依赖于编辑器的功能的(这个插件是我离不开 VS Code 的一个重要原因)。
ghr 这类工具放在以前,我大概率不会写到这个程度。细节太多,投入产出不划算。
TUI 里的鼠标选择、快捷键冲突、评论编辑框、draft 保存、列表分页、缓存失效、各种 GitHub API 的形状,每一个都不难,但都要花时间。AI 让这些小改动的成本降了很多,于是个人工具可以变得更“奢侈”:它不需要证明自己有市场,只要能持续改善我的日常工作流,就值得往前推一点。
欢迎试用,欢迎提 issue,也欢迎 PR:ghr。
2026-05-01 13:08:26
最近写了一个 Chrome 插件,叫 GitHeron。它想解决的问题很简单:
Web highlights and clippings, synced to GitHub as Markdown.
我一直使用 Hypothesis 来同步冲浪记录,然后使用一个 Obsidian 插件来同步到我的知识库。但 hypothesis 的浏览器插件体验不佳,时不时需要登录,选中文字打算做备注时又偶尔无法激活,我就想自己写个插件来解决这个问题。
GitHeron 的思路是直接使用 Github token 访问私有 repo,通过 API 把数据写入仓库。GitHub 当然不是传统意义上的数据库。但对个人工具来说,它已经提供了很多“数据库”才有的能力:同步、历史、权限、备份、API、跨设备访问。更重要的是,这些都完全是由自己控制的。
GitHeron 最核心的功能是网页标注。
在网页上选中一段文字,按下快捷键 (默认 Ctrl+E),就可以打开 note 编辑框。写完之后,这段文字会在页面上变成高亮。下次再打开同一个页面,GitHeron 会自动把之前的高亮恢复出来。
这件事听起来不复杂,但体验上很重要。很多阅读笔记工具只能把内容保存走,却不能在原网页上重新建立上下文。GitHeron 更在意的是“回到现场”:当你再次打开这篇文章时,能立刻看到自己上次为什么停在这里。
写 note 时也可以加 tags,最近使用过的 tags 会出现在输入框附近:

除了高亮,GitHeron 还可以保存当前网页的主要内容。
按下快捷键 (默认 Ctrl + O) 后,它会提取页面正文,转换成 Markdown,然后保存到仓库中的 Clippings 目录。这里保存的是 main content,不是整个网页 HTML,所以导航栏、广告、推荐列表这些内容会尽量被过滤掉。
网页剪藏部分使用 Defuddle 来提取 main content,再转换成 Markdown。它不能保证所有网页都完美,但比直接保存整个 DOM 更接近“我真正想留下来的文章内容”。
这个功能更接近 Obsidian Web Clipper:遇到一篇值得完整保存的文章,不需要复制粘贴,也不需要手工整理格式,直接让它进入自己的 Markdown 仓库。
在 Settings 填入一个 Github repo 地址,私有的或者公开的都行,然后去 Github token 页面生成一个 token 含有写入这个 repo 权限的 token,填入插件的配置里即可。
默认有两个快捷键:
Ctrl+E:给当前选中文字添加 note;Ctrl+O:保存当前网页正文。如果喜欢鼠标操作,也可以开启选中文字后的悬浮按钮;如果不喜欢它打扰阅读,可以在 settings 里关掉,只使用快捷键。
同步 GitHub 时也有两种模式。普通模式会等 GitHub 写入完成再结束;后台同步模式则会先更新页面状态,把任务放到后台慢慢同步。网络失败或 GitHub 返回错误时,可以在 settings 的 tasks 里看到最近任务,并进行 retry。
写 note 应该是一个很轻的动作,不应该因为网络慢而打断阅读节奏。

GitHeron 是一个 Chrome MV3 插件,主要由 content script 和 service worker 组成。
content script 负责页面里的交互:选区、高亮、快捷键、弹框和正文提取。为了避免被网页自身样式影响,弹框和面板都放在 Shadow DOM 里。
service worker 负责设置、后台任务和 GitHub API。写入仓库时使用 GitHub 的 Git Data API 来生成 commit,这样一次保存可以同时更新 Markdown 内容和用于恢复高亮的辅助数据。
这里有一个取舍:Markdown 文件应该尽量保持可读,不应该塞进大段元数据。所以 GitHeron 会把可读内容写进 .md,把用于定位高亮的 selector 信息放到旁边的 JSON 文件里。这样仓库里既有人能直接读的笔记,也有插件重新打开网页时需要的结构化数据。
GitHeron 是一个很个人化的工具,它的目标不是做一个复杂的标注系统,而是让“读到有用内容”到“进入自己的知识库”之间少一点摩擦。
对了,我最近还 Vibe coding 了另一个小插件 auto tabs,也是解决我日常的具体问题的。在 AI 时代,稍微有点编程经验的人都会把自己的工作流优化到极致。
2026-02-12 16:55:52
今天跑 Rust 编译器测试的时候又发现非常地慢,CPU 资源根本无法利用起来,我记得几年前碰到过这个问题,当时我写了篇文章分享出来,并发现很多人都有同样的困扰。
而我今天碰到的这个问题虽然现象一样,但解决方法又不同了。我不确定是 macOS 系统更新,亦或是我更新了 VS Code 造成的。
复现脚本很简单,循环创建随机命名的 shell 脚本,然后对比首次和再次执行的耗时:
#!/bin/bash
rm -rf /tmp/speed_test
mkdir -p /tmp/speed_test

for i in {1..10}; do
    FILENAME=$(openssl rand -hex 10)
    echo $'#!/bin/sh\necho Hello' > "/tmp/speed_test/$FILENAME.sh"
    chmod a+x "/tmp/speed_test/$FILENAME.sh"
    FILE="/tmp/speed_test/$FILENAME.sh"

    first=$(TIMEFORMAT="%R"; (time $FILE > /dev/null) 2>&1)
    second=$(TIMEFORMAT="%R"; (time $FILE > /dev/null) 2>&1)
    echo "第一次: $first  第二次: $second"
done
在 VS Code 终端的输出:
第一次: 0.525  第二次: 0.007
第一次: 0.290  第二次: 0.009
第一次: 0.280  第二次: 0.007
第一次: 0.272  第二次: 0.008
第一次: 0.307  第二次: 0.008
...
差距大概 30-50 倍。换到 Warp 终端跑同一个脚本,两次都在 0.006s 左右。
应该不是我上篇文章提到的 SIP 问题,我确定 System Settings → Privacy & Security → Developer Tools 中已经加入了 VS Code。
看起来也不像是文件系统缓存的原因,因为 0.2-0.5 秒远超磁盘缓存的量级。用 log show 看了下系统日志:
log show --predicate 'subsystem == "com.apple.syspolicy.exec"' --last 2m --style compact
输出大量这样的记录:
GK performScan: PST: (path: 8d0e4c2de41c3e77), (team: (null)), (id: (null)), (bundle_id: (null))
Error Domain=NSOSStatusErrorDomain Code=-67062
GK evaluateScanResult: 2, PST: (path: 8d0e4c2de41c3e77), ... (bundle_id: NOT_A_BUNDLE), 0, 0, 1, 0, 7, 7, 0
从日志上看每次执行新文件 syspolicyd 都会做一次 GK performScan。这就是 macOS 的 Gatekeeper 安全扫描——对首次执行的新可执行文件做代码签名验证和恶意软件检查。扫描结果会被缓存,所以同一个文件第二次执行就快了。
进一步验证:我们把测试脚本里改成 (time /bin/sh $FILE > /dev/null) 2>&1,这样就是直接通过 sh 来执行:
直接执行 ./script.sh  → 0.248s (触发 execve → Gatekeeper 扫描)
/bin/sh ./script.sh   → 0.006s (只是让 /bin/sh 读取文件,不触发安全扫描)
原因确认了。当用 ./script.sh 执行时,内核的 execve 系统调用会触发 AppleSystemPolicy.kext 中的 MACF hook (mpo_proc_notify_exec_complete),通知 syspolicyd 进行评估。而 /bin/sh script.sh 只是让已受信的 /bin/sh 进程读取文件内容来解释执行,不触发 execve 的安全检查路径。
接着试了 System Settings → Privacy & Security → Full Disk Access,给 VS Code 完全磁盘访问权限。重启 VS Code,再跑脚本:
第一次: 0.005  第二次: 0.005
第一次: 0.005  第二次: 0.005
第一次: 0.006  第二次: 0.006
...
问题消失了。syspolicyd 日志中的 performScan 也不再出现。
Full Disk Access (FDA) 在 macOS 的 TCC (Transparency, Consent, and Control) 框架中对应的是 kTCCServiceSystemPolicyAllFiles 权限。这个权限的含义远超“磁盘访问“——它实际上是 TCC 框架中最高级别的信任授权。
macOS 会追踪每个进程的 responsible process(负责进程)。在 VS Code 终端中敲的命令,它的 responsible process 是 VS Code 本身。当 AppleSystemPolicy.kext 的 MACF hook 拦截到 execve 后,会检查 responsible process 的信任级别。拥有 FDA 授权的进程被识别为高信任来源,syspolicyd 会走快速路径,跳过完整的 Gatekeeper 扫描。
而 Warp 这些原生终端,因为我已经加入系统默认信任的开发工具列表,所以它们派生的子进程一开始就不会触发完整扫描。
需要说明:Apple 没有公开文档化这个具体流程。上面的描述来自实验推断和社区逆向分析,不是官方说法。
发现 FDA 有效之后,我尝试反向验证:把 VS Code 从 FDA 列表中移除,重启 VS Code,再跑脚本。
结果:仍然很快。问题没有复现。
syspolicyd 的扫描评估结果存储在 /var/db/SystemPolicyConfiguration/ExecPolicy 这个 SQLite 数据库中(35MB),同时 AppleSystemPolicy.kext 在内核中维护了一个运行时缓存:
$ sysctl security.mac.asp.stats.cache_entry_count
security.mac.asp.stats.cache_entry_count: 4700
也就是说,当 VS Code 拥有 FDA 时,它被评估为可信 responsible process,这个信任结果被持久化了。移除 FDA 后,历史记录并不会被清除。macOS 的安全评估系统是“学习型“的——它记住过去的信任决策。
要彻底重现原来的问题,可能需要重启 Mac 清除内核缓存,或者更极端地清理 ExecPolicy 数据库。
如果你也遇到类似的问题——新编译的程序、新创建的脚本首次执行莫名其妙地慢,可以检查一下是不是 Gatekeeper 的锅:
# 查看最近的 syspolicyd 扫描记录
log show --predicate 'subsystem == "com.apple.syspolicy.exec"' --last 5m --style compact | grep performScan
解决方案按排序:


